

Lab 12 – TrueNAS NAS: installation and preparation
Dependencies
Section titled “Dependencies”- Previous labs: Lab 01 for the addressing plan and Lab 02 for DNS, with the records for
desonas.proxmox.community. The NAS does not depend on the cluster: you can prepare it in parallel with Part 0. - Server:
desonas, with 4 cores, 16 GB of RAM, a 32 GB system disk, two 100 GB data disks and a network card on the lab LAN. - ISO:
TrueNAS-SCALE-25.10.8.iso(TrueNAS Community Edition 25.10 “Goldeye”), from truenas.com, on a USB stick or on the virtual media of the management card. - Services: DNS
172.27.199.20, NTP and proxy onnetsvc.proxmox.community(aliasesntpandproxy). - Addresses:
172.27.199.10for the NAS. - Credentials:
truenas_admin/<lab-password>→ Appendix B.
Objectives
Section titled “Objectives”- Install TrueNAS Community Edition and configure its static network from the console.
- Complete the basic configuration from the web interface: time zone, NTP, DNS and proxy.
- Create a mirrored ZFS pool for the data.
- Prepare the datasets that NFS, SMB and iSCSI will use in the following labs.
- Create a service user for Proxmox VE.
How it works
Section titled “How it works”The role of the NAS in the lab
Section titled “The role of the NAS in the lab”So far the VM disks have stayed on the nodes (local-zfs). A shared storage, visible in the same way from all nodes, makes it possible to migrate VMs without copying their disks and to restart them elsewhere if a node fails (labs 48-49). In the lab it is provided by a NAS outside the cluster, over three protocols:
| Protocol | Level | What Proxmox VE sees | Lab |
|---|---|---|---|
| NFS | file | a shared directory: disks as raw or qcow2 files, ISOs, backups, templates |
13 |
| SMB/CIFS | file | like NFS, authenticated with a user name and password | 14 |
| iSCSI | block | a disk (LUN) on which to create shared LVM | 15 |
TrueNAS Community Edition
Section titled “TrueNAS Community Edition”TrueNAS Community Edition (called SCALE up to version 24.10) is a NAS operating system based on Debian and OpenZFS: the same concepts as in lab 10, managed from a web interface.
- The boot pool (
boot-pool) contains only the operating system, on a dedicated disk. The data goes into a separate data pool, on the other disks. - In the pool you create datasets, i.e. file systems with their own properties (compression, quotas, permissions), and zvols, the block devices that iSCSI needs.
- The ZFS rules apply to a real NAS too: disks seen directly, with no RAID controller (at most an HBA in IT/passthrough mode), ECC RAM recommended and, for VMs, mirrored pools.
Procedure
Section titled “Procedure”1. Installation from the console
Section titled “1. Installation from the console”-
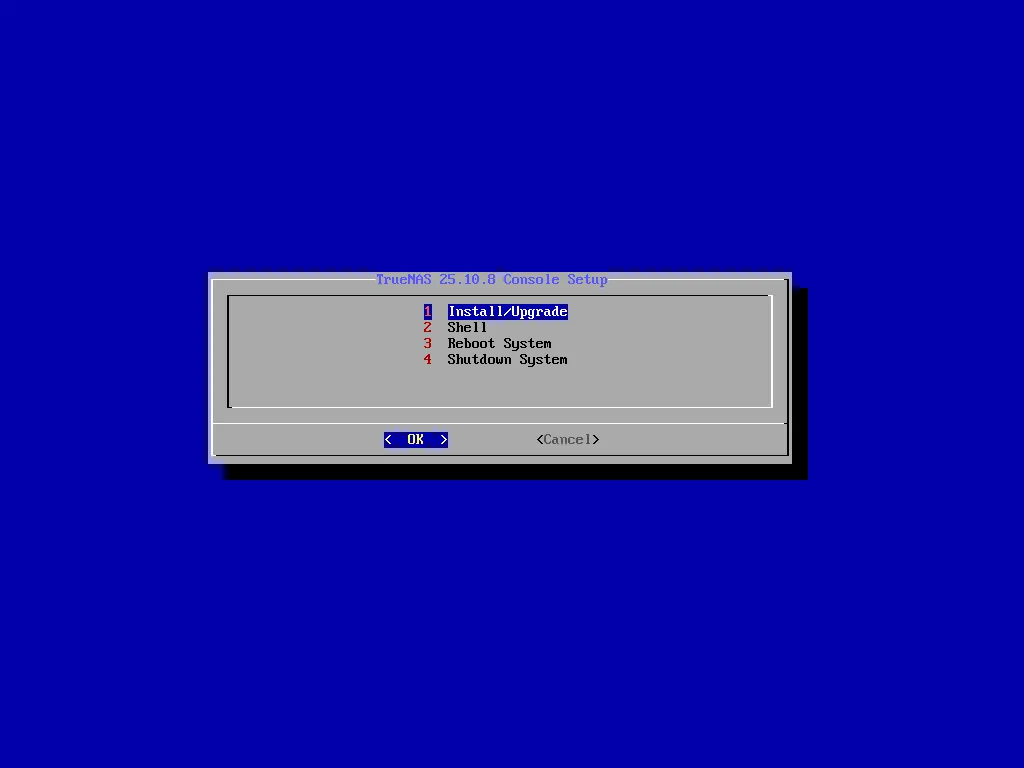
Boot the NAS from the USB stick with the ISO (or from the virtual media of the management card) and choose Install/Upgrade.
-
With the space bar, select only the 32 GiB disk (
sdb) and confirm with OK. The two 100 GiB disks remain free for the data pool: the disk you install on can no longer hold data. At the next prompt, confirm that the disk will be erased.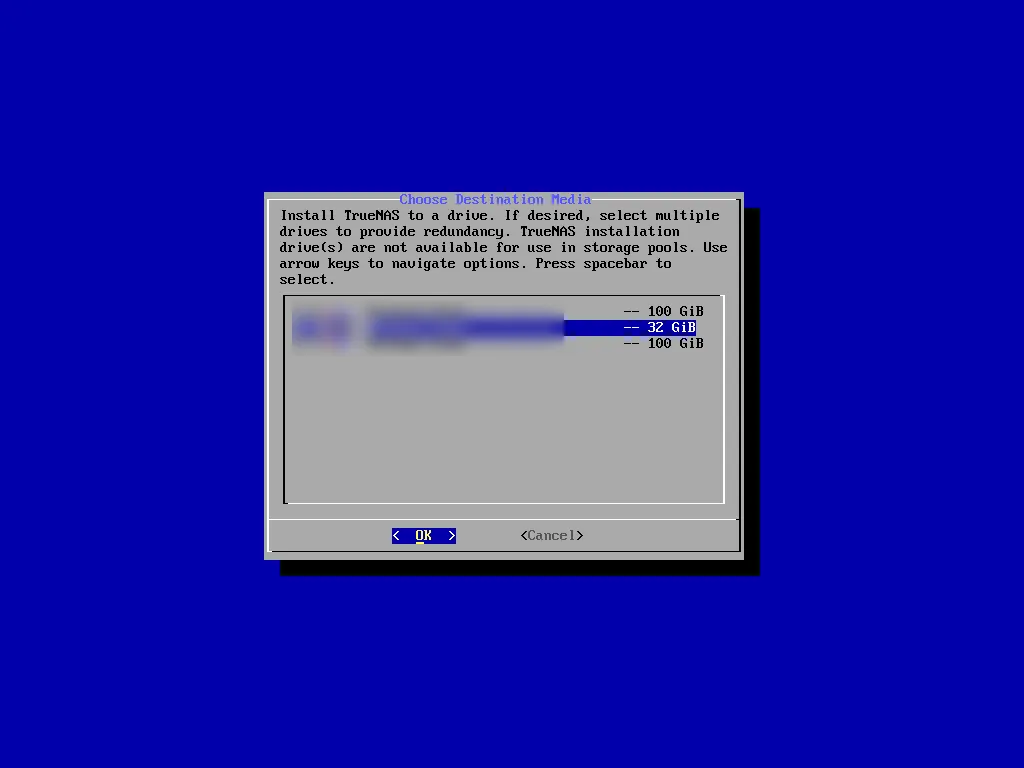
As throughout the manual, the data that identify the hardware (model and serial number of the disks, name and physical address of the network card) are obscured in the screenshots.
-
As the authentication method, choose Administrative user (truenas_admin) and set the password. Direct password login for
rootremains disabled.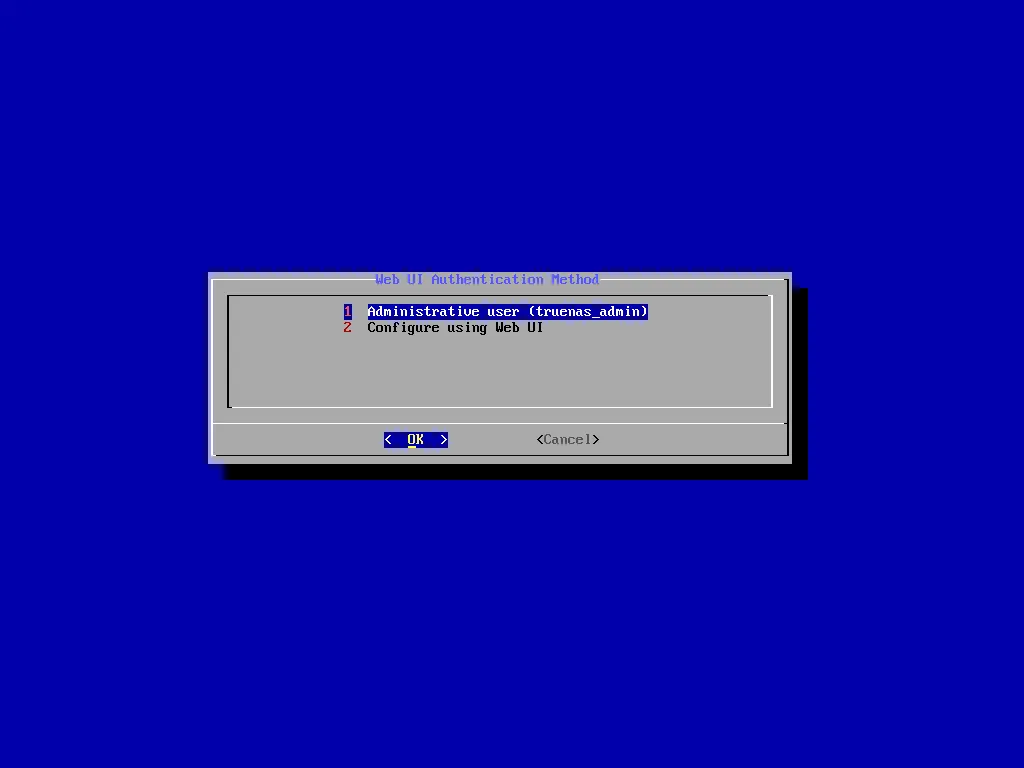
-
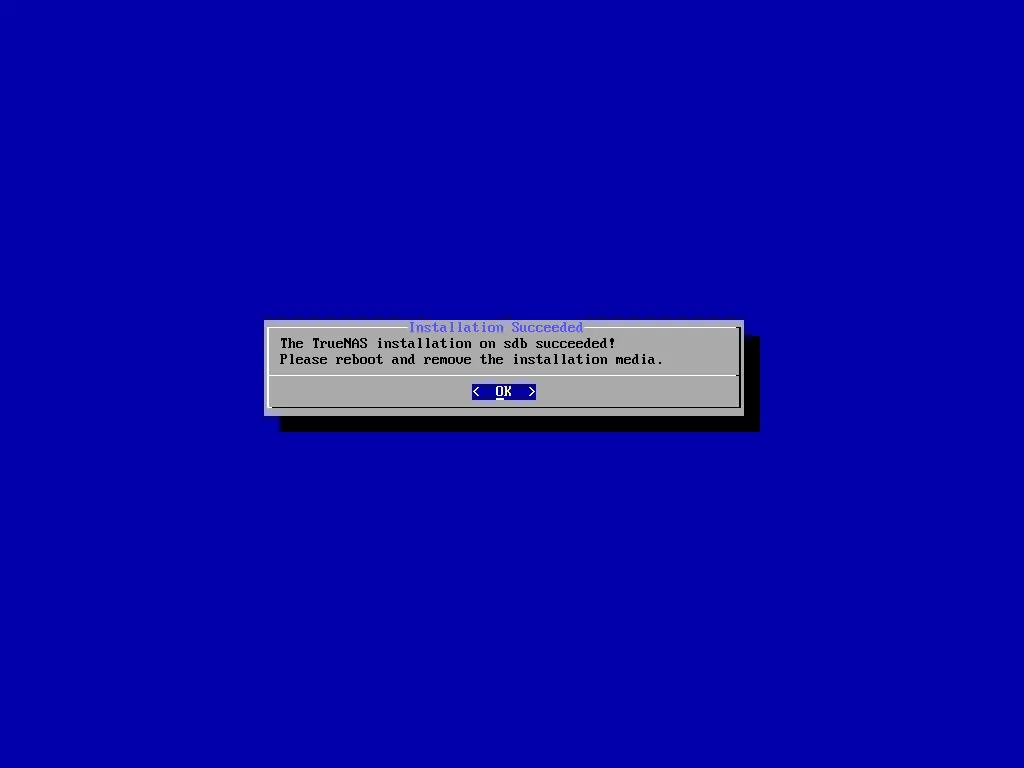
When the installation is done, remove the USB stick (or unmount the virtual media) and reboot from the disk.
2. Static network from the console
Section titled “2. Static network from the console”There is no DHCP server on the lab network, so at first boot the NAS has no address and the console warns that the web interface is not reachable:

-
Choose 1) Configure network interfaces and open the only interface. Set
ipv4_dhcpto No and inaliasesenter172.27.199.10/24, then Save.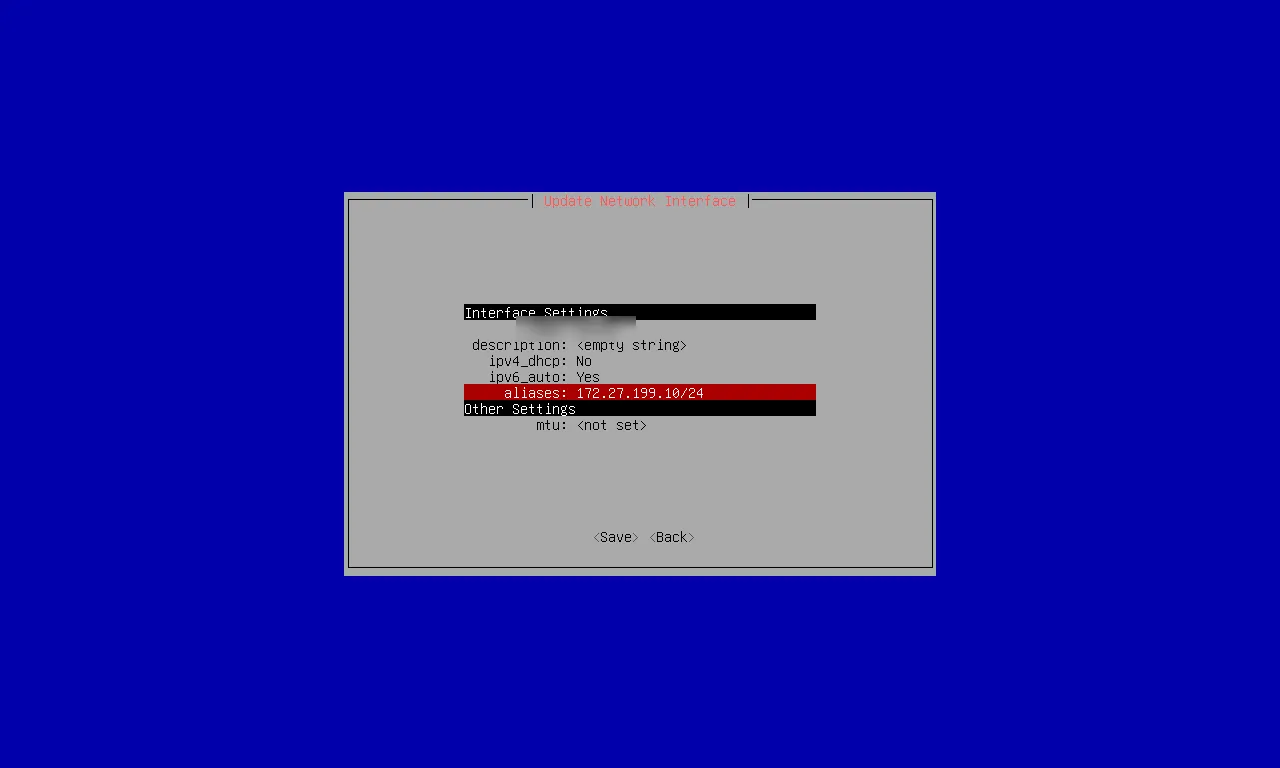
-
Press a to apply. TrueNAS applies the change with an automatic rollback after 60 seconds: if the new network settings made you lose access, the configuration would revert by itself. If everything works, press p to make it permanent (persist).
-
Choose 2) Configure network settings:
hostnamedesonas,domainproxmox.community,ipv4gateway172.27.199.1,nameserver1172.27.199.20, then Save. In version 25.10 the gateway is set here: the menu no longer has a separate entry for the default route.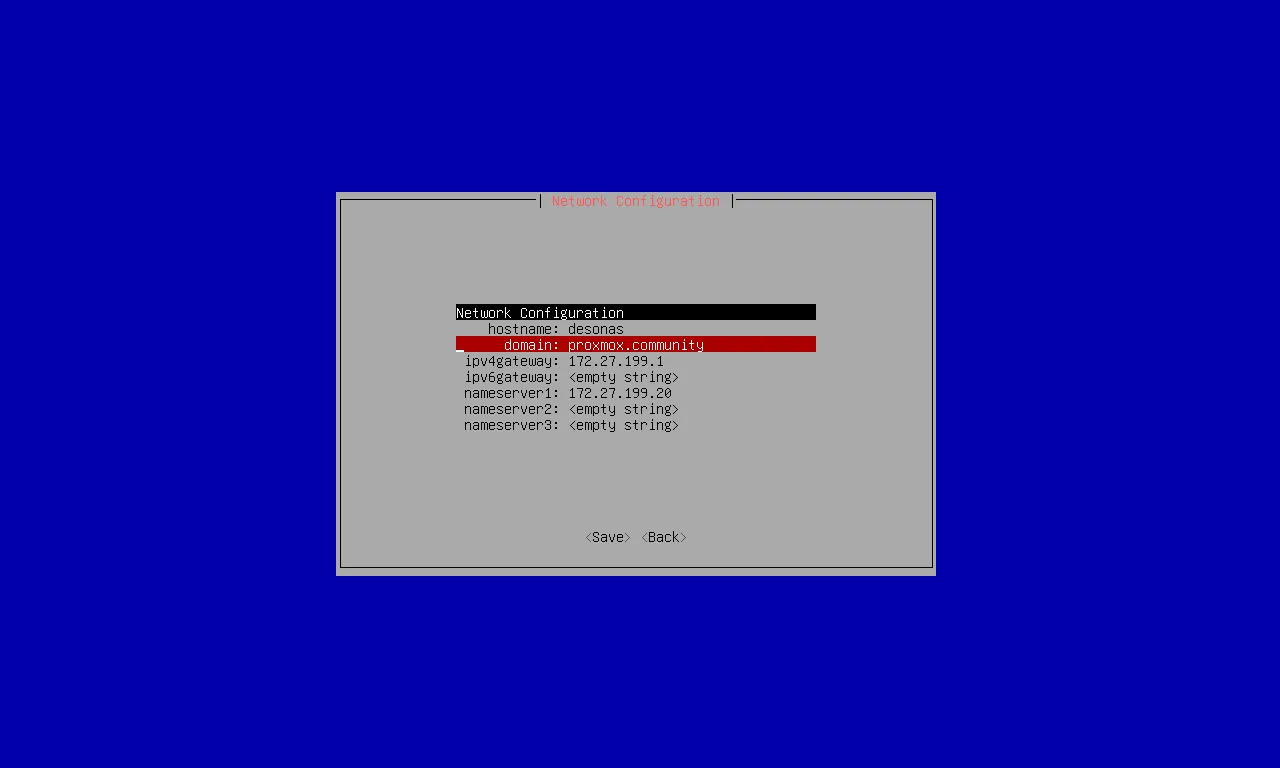
-
The console now shows the address of the web interface:

3. First access to the web interface
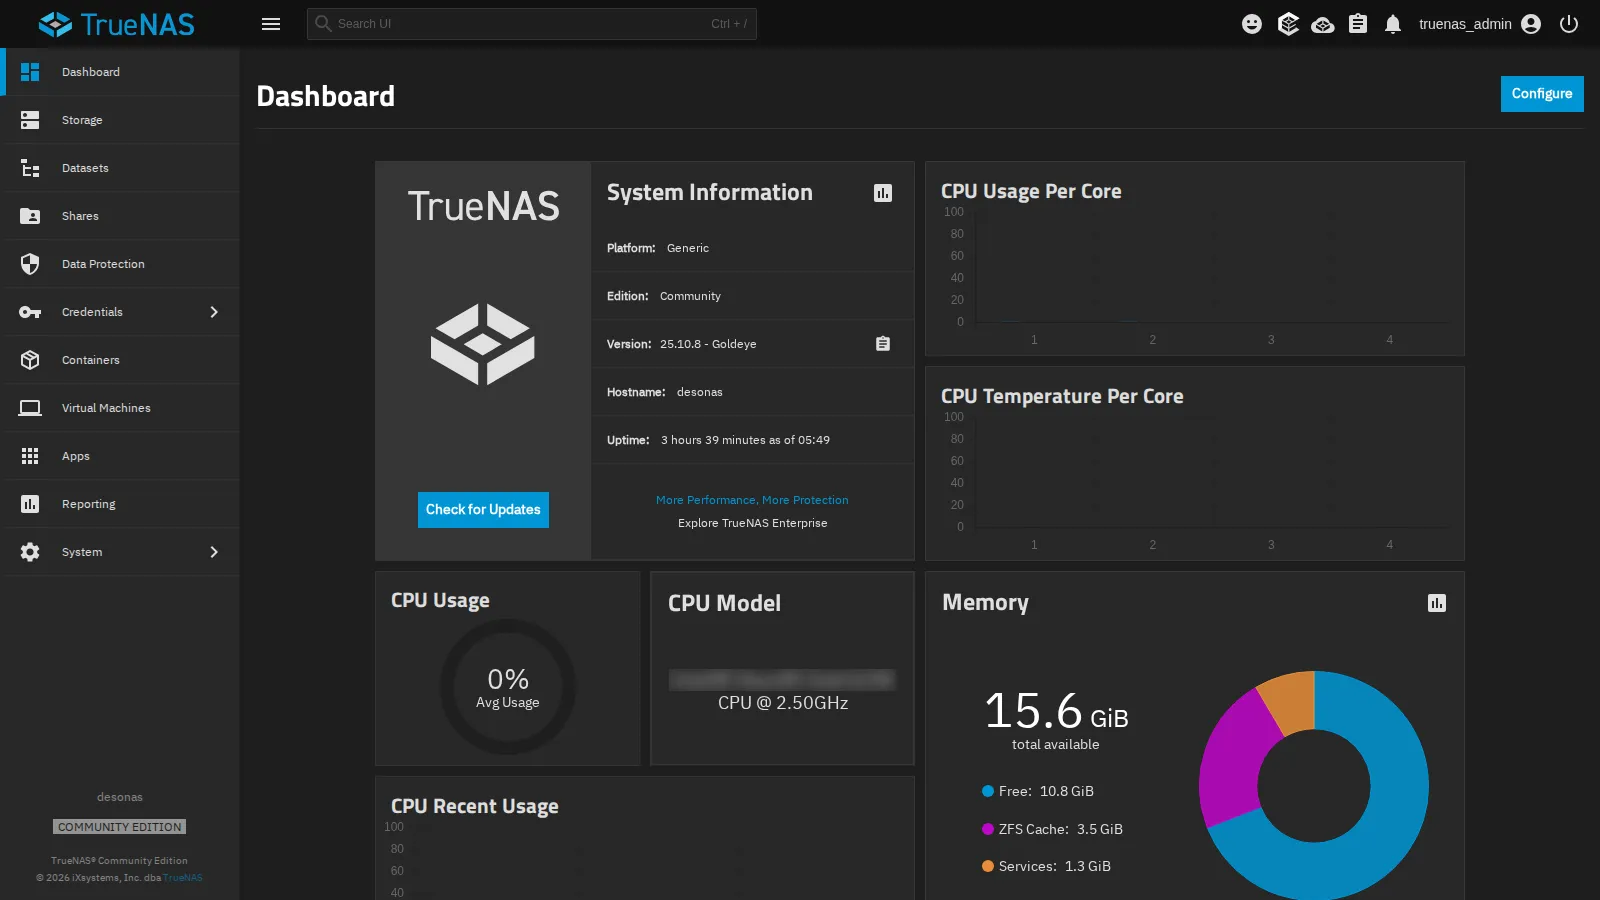
Section titled “3. First access to the web interface”From the DC, open https://desonas.proxmox.community and log in as truenas_admin. The certificate is self-signed, like the Proxmox VE one.
4. Time zone and keyboard
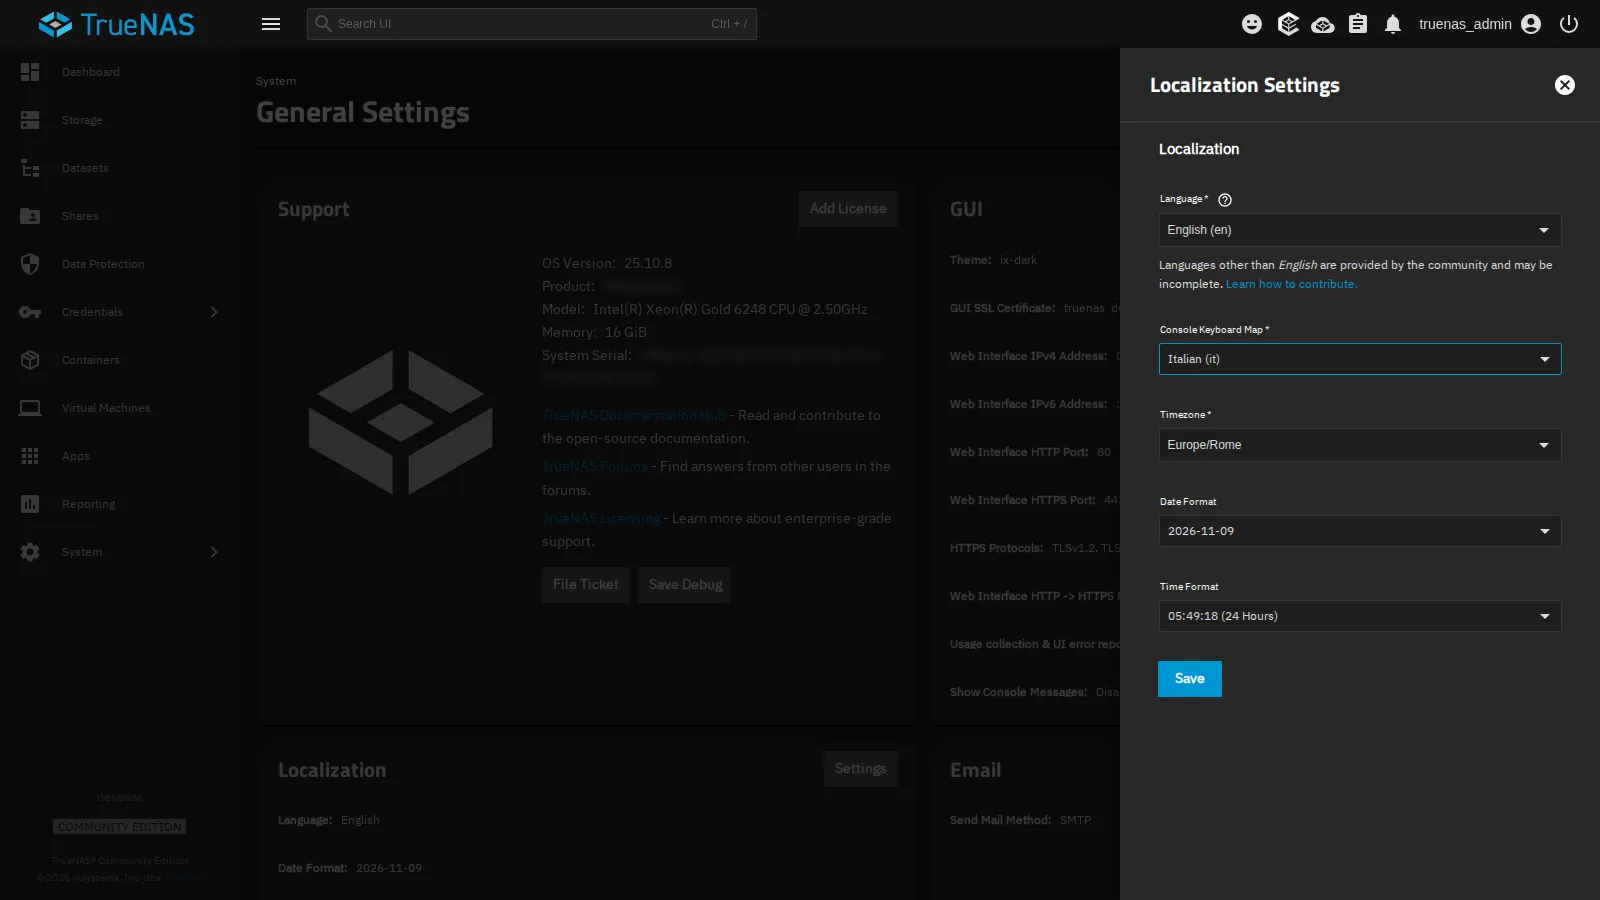
Section titled “4. Time zone and keyboard”System → General Settings → Localization → Settings: Timezone Europe/Rome, Console Keyboard Map Italian (it), then Save. Without this step the NAS clock stays on America/Los_Angeles, and logs and scheduled snapshots are nine hours off from the rest of the lab.
5. Time synchronization
Section titled “5. Time synchronization”Accurate time matters: notifications, logs and, in lab 14, SMB authentication depend on it. The default servers (*.debian.pool.ntp.org) are on the Internet and cannot be reached from the lab.
-
System → Advanced Settings (confirm the warning) → NTP Servers → Add.
-
Address
ntp.proxmox.community, check IBurst (fast initial synchronization) and Prefer, then Save. TrueNAS queries the server right away and rejects an address that does not respond, unless you check Force.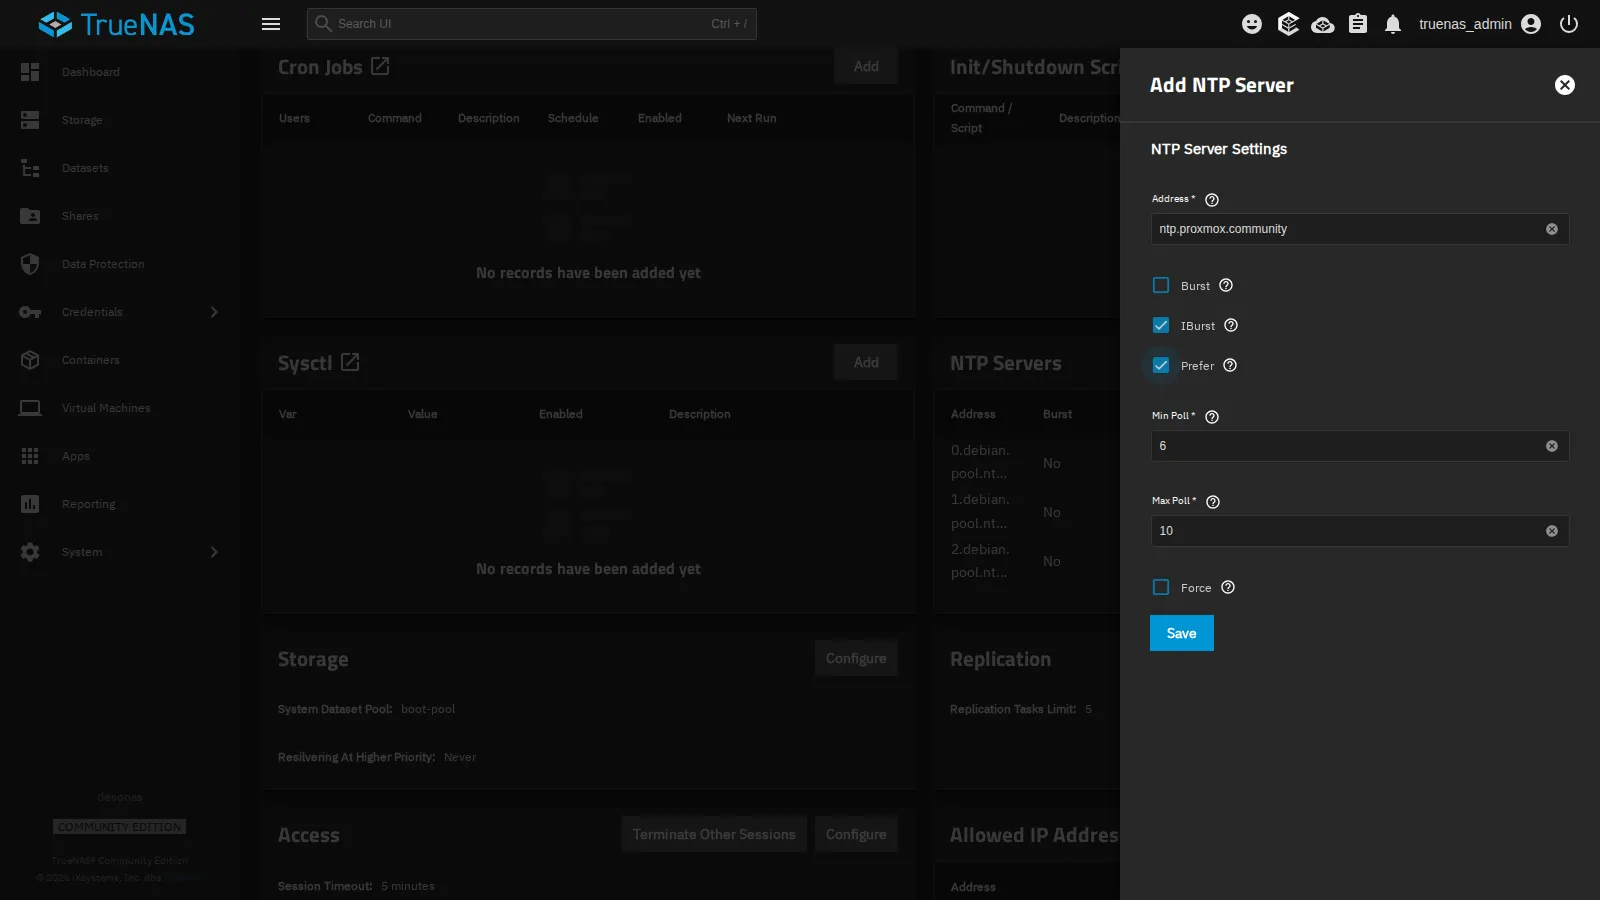
-
Delete the three servers
0,1and2.debian.pool.ntp.orgwith the trash icon, confirming each time.
6. DNS, gateway and proxy
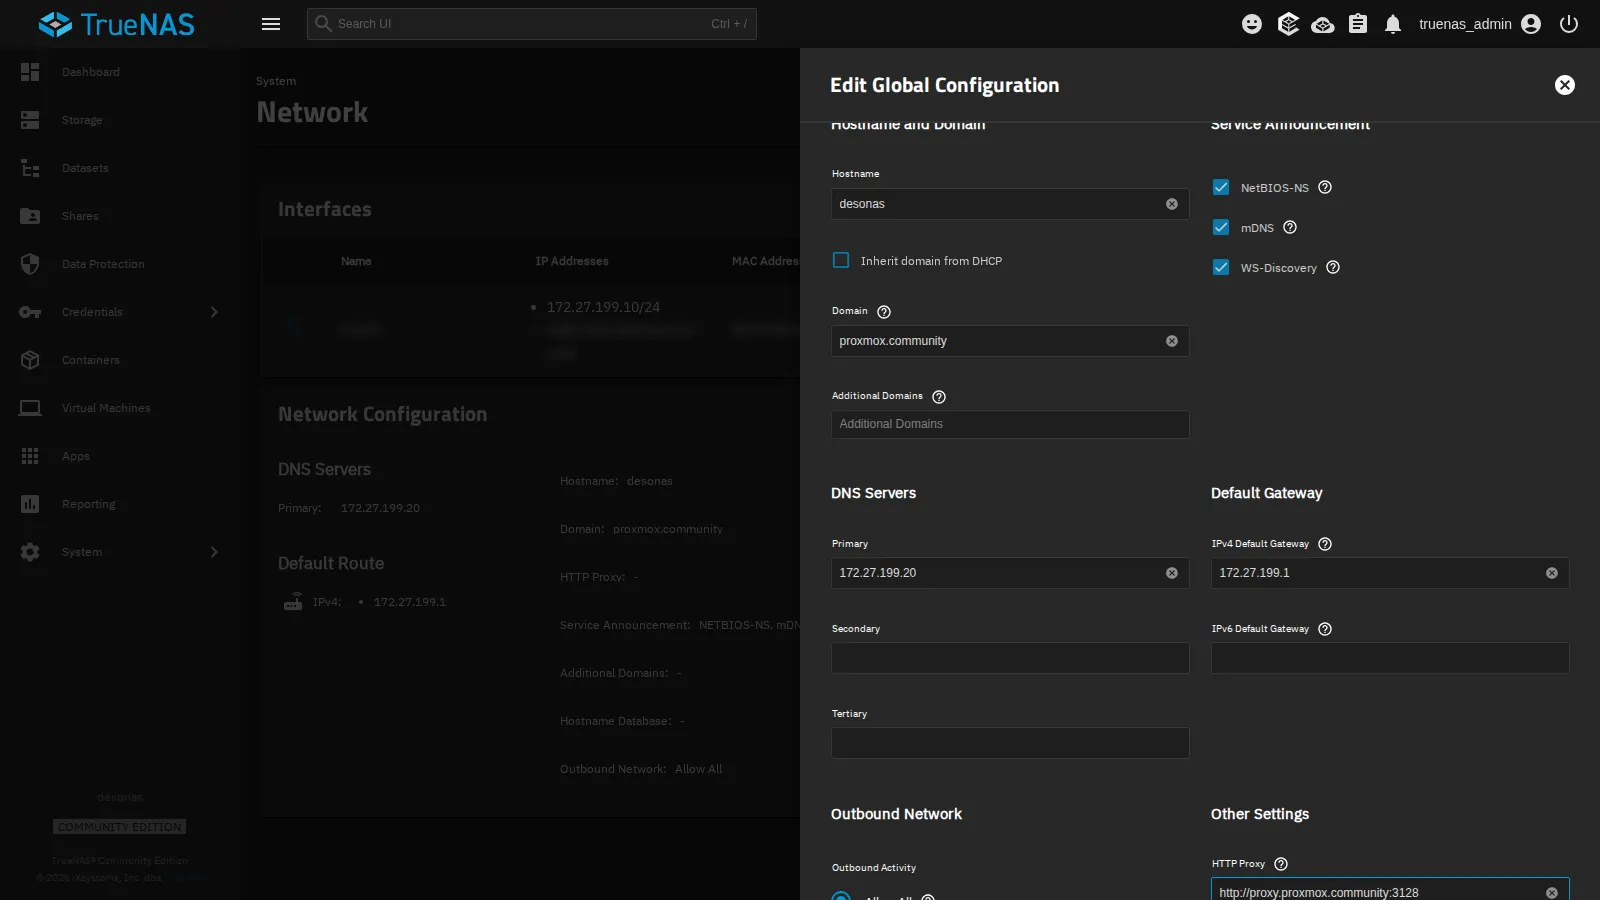
Section titled “6. DNS, gateway and proxy”System → Network → Network Configuration → Settings summarizes what was set from the console: hostname, domain, DNS and gateway. In HTTP Proxy enter http://proxy.proxmox.community:3128: TrueNAS will use it to check for updates, just as Proxmox VE uses the datacenter proxy (lab 04). Save.
7. The mirrored data pool
Section titled “7. The mirrored data pool”-
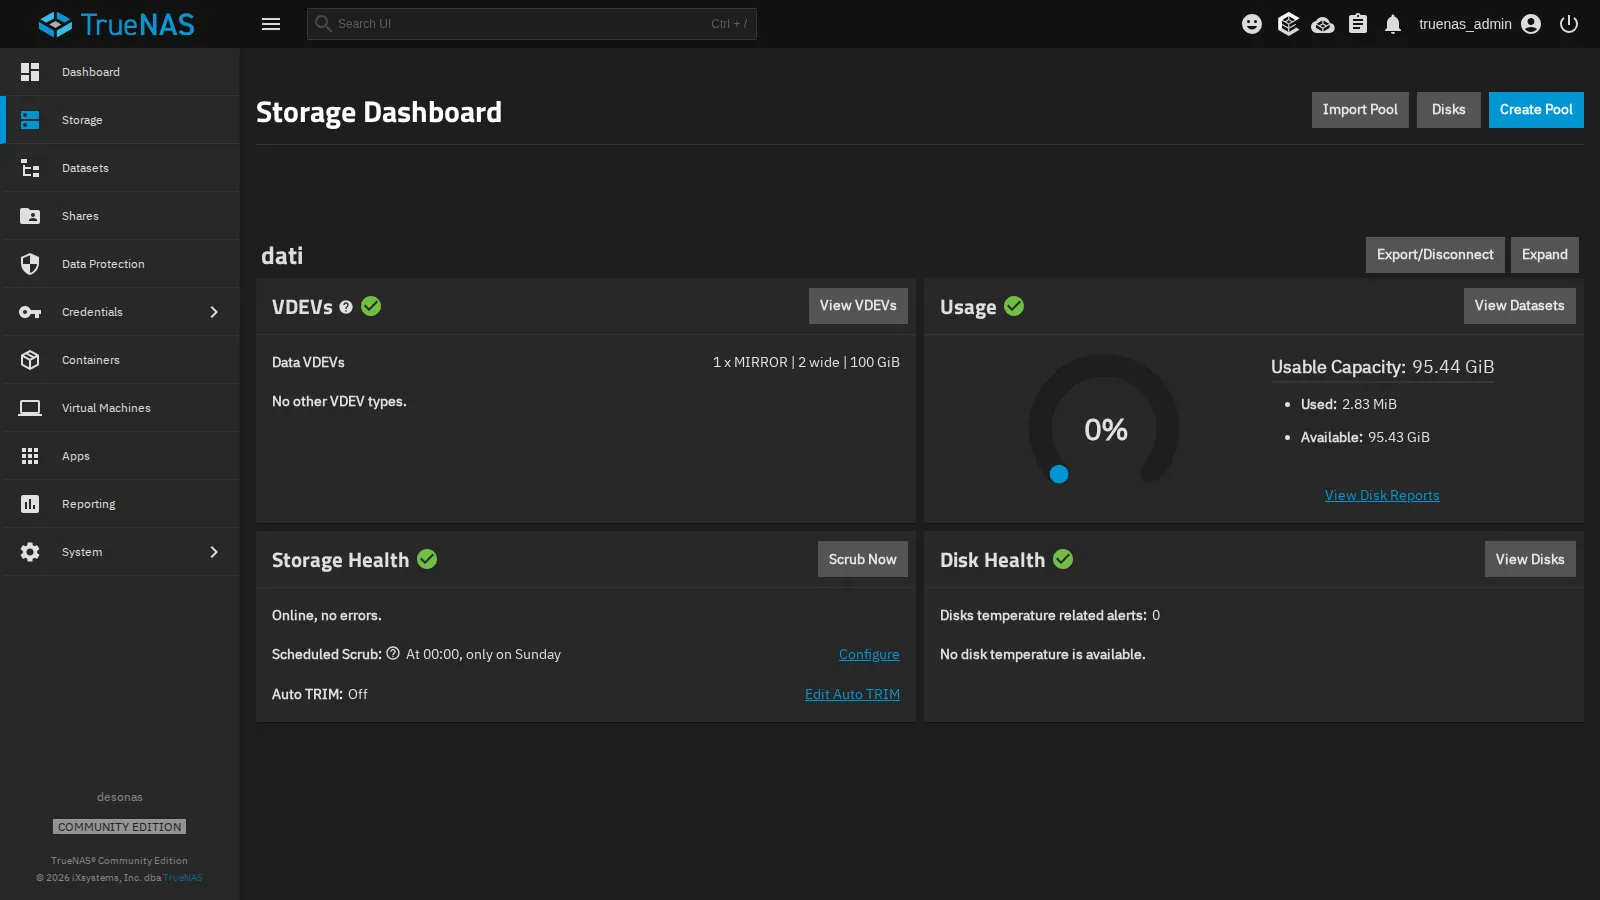
Storage → Create Pool. In the General Info step the name is
dati, with no encryption. -
In the Data step choose Layout
Mirror; in the automatic disk selection, Disk Size100 GiB (HDD), Width2(disks per vdev) and Number of VDEVs1.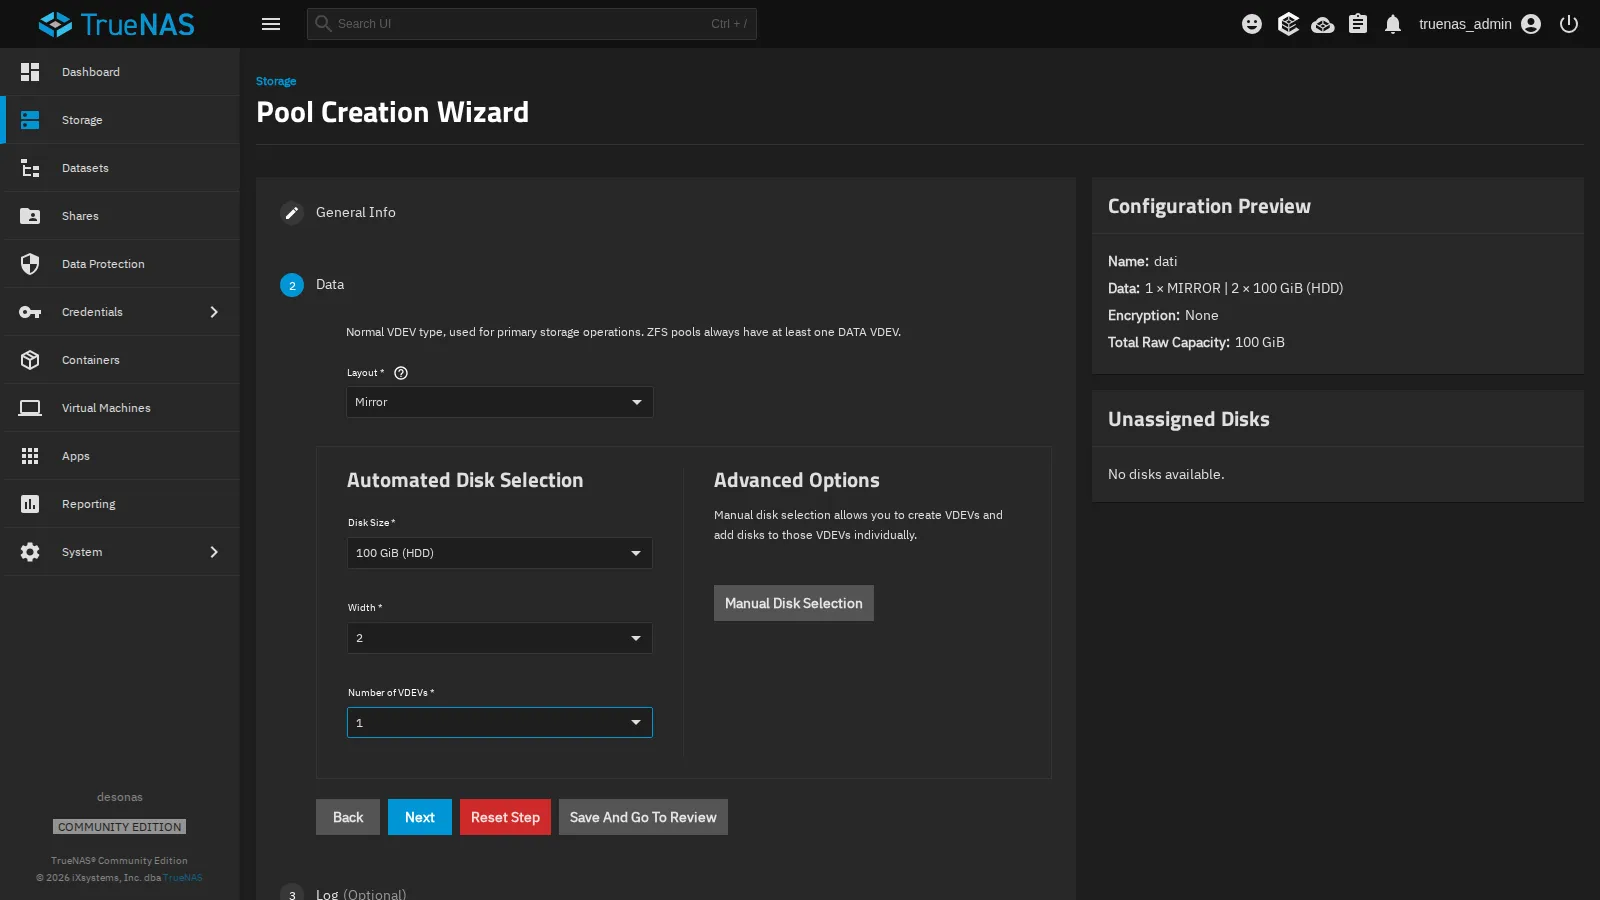
-
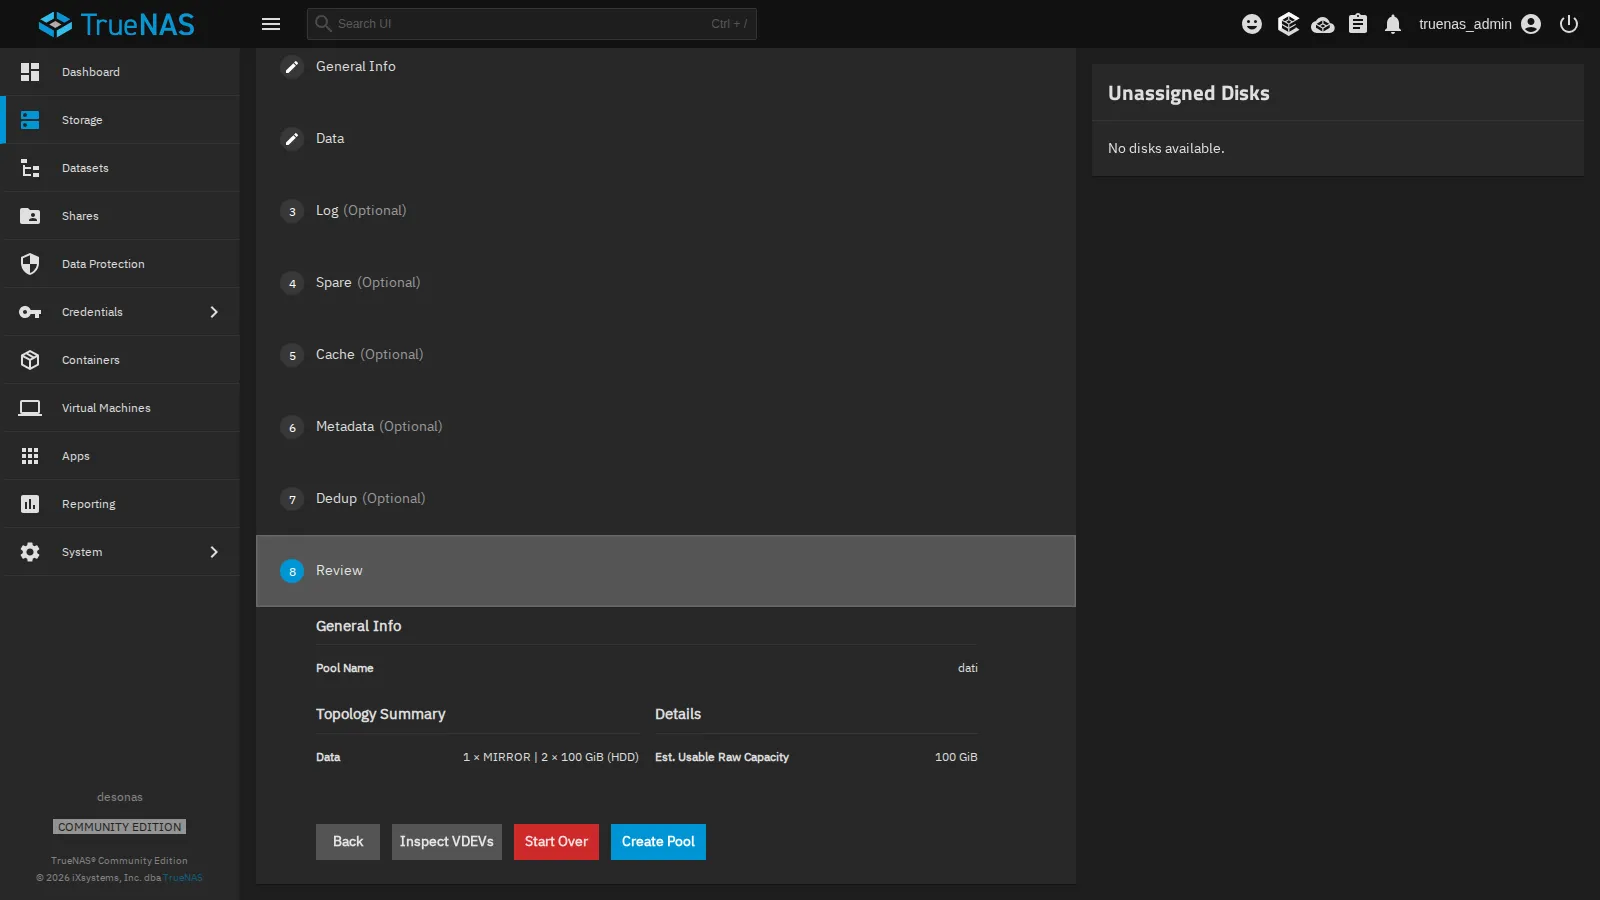
Skip the optional steps (Log, Spare, Cache, Metadata, Dedup) with Save And Go To Review and check the summary: a mirror of two 100 GiB disks.
-
Create Pool, check Confirm in the warning that the disks will be erased and click Continue. After a few seconds the pool is online: 95.44 GiB usable, with a scrub already scheduled every Sunday at midnight.
8. The datasets for the three protocols
Section titled “8. The datasets for the three protocols”Each protocol gets its own dataset, with independent properties and permissions.
-
Datasets → select
dati→ Add Dataset: Namenfs, Dataset PresetGeneric, then Save.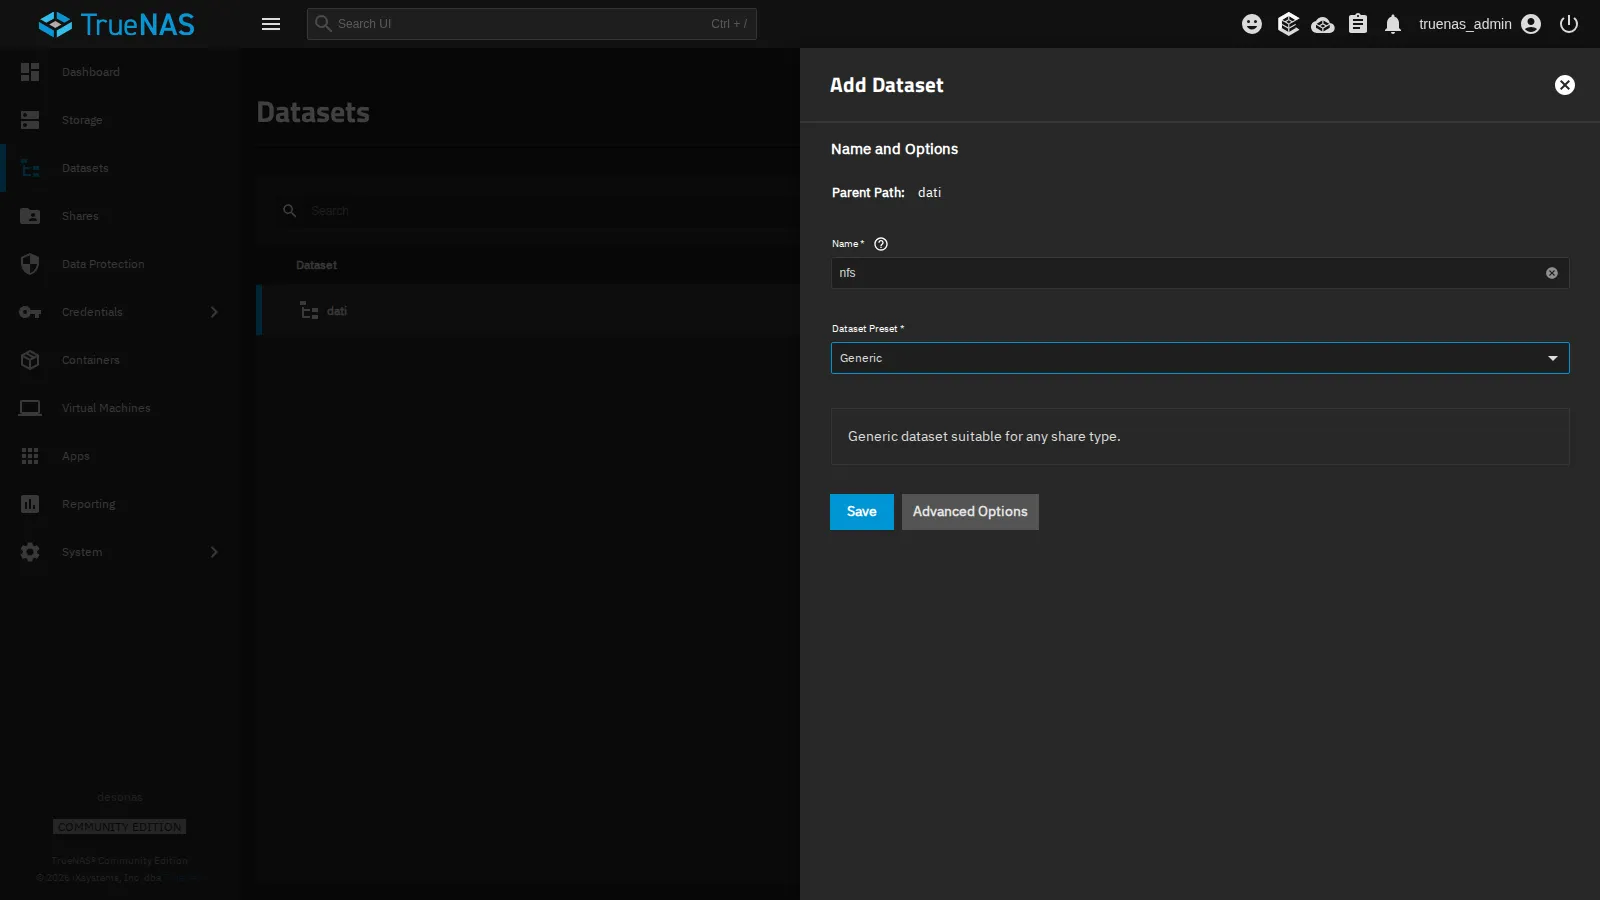
-
Repeat for
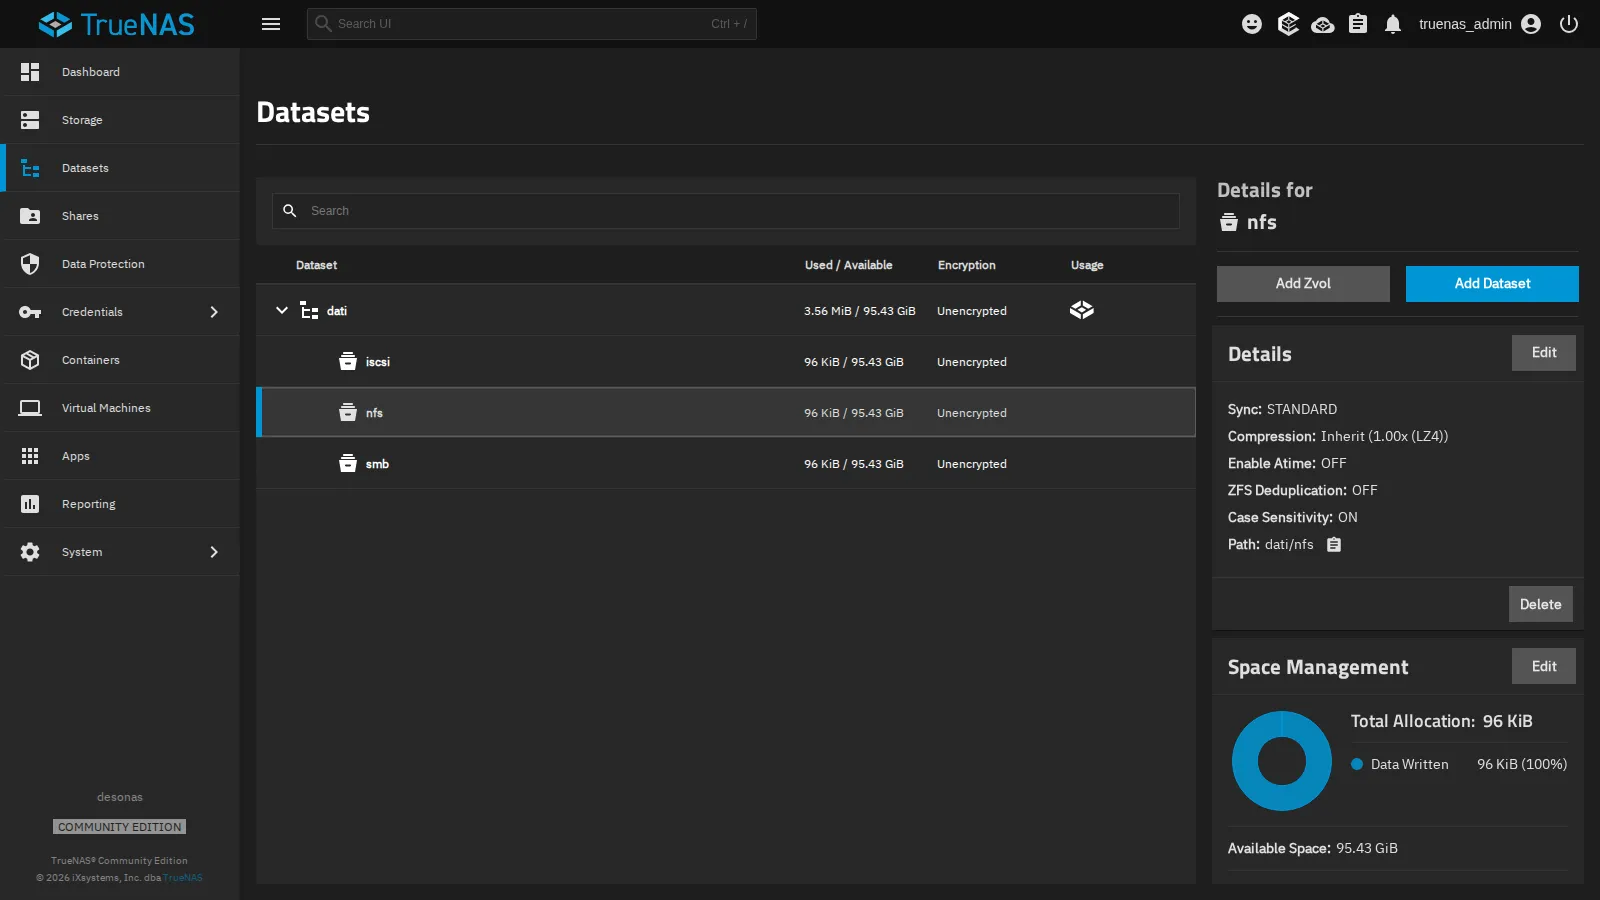
smbwith Dataset PresetSMBand clear the Create SMB Share checkbox: you will create the share in lab 14. The SMB preset sets permissions and options suited to Windows (NFSv4 ACLs, case-insensitive names). -
Repeat for
iscsiwith theGenericpreset: it will hold the zvols of lab 15.
The three datasets inherit LZ4 compression and atime disabled from the pool:
9. The service user
Section titled “9. The service user”Proxmox VE will access the SMB share with a dedicated user, not with the NAS administrator.
-
Credentials → Users → Add.
-
Username
svc-pve, leave only SMB Access enabled, set the password<lab-password>. No access to the shell, SSH or the web interface.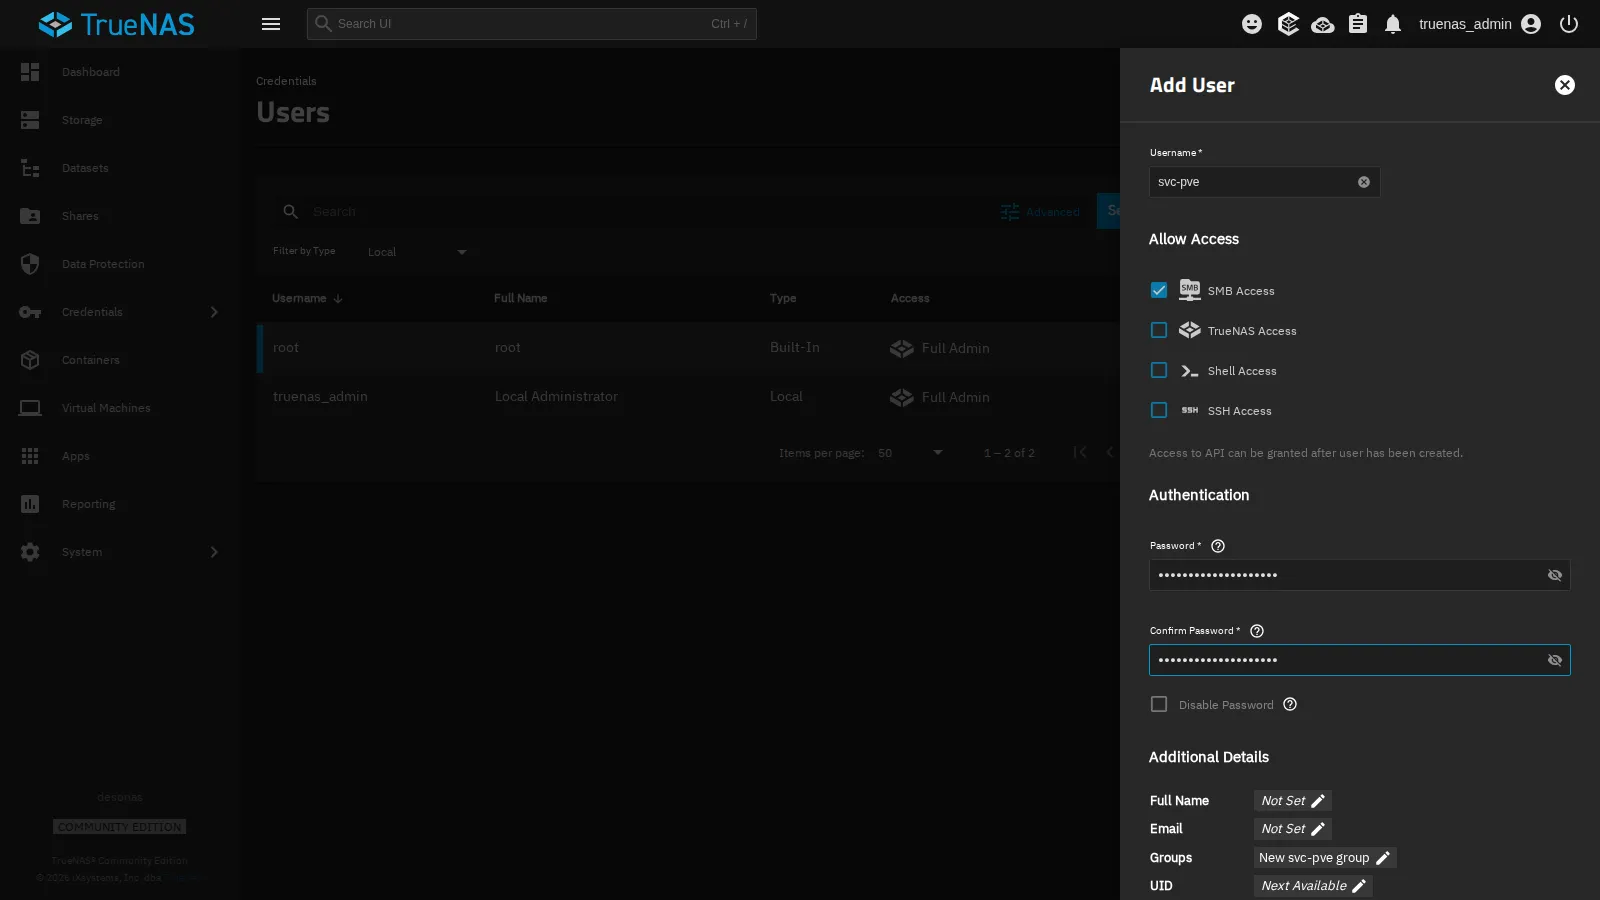
-
Save.
Verification and tests
Section titled “Verification and tests”From a cluster node, check that the NAS answers to its name, that reverse DNS is correct and that its clock matches the nodes’:
host desonas.proxmox.communitydesonas.proxmox.community has address 172.27.199.10host 172.27.199.1010.199.27.172.in-addr.arpa domain name pointer desonas.proxmox.community.ping -c2 -W1 desonas.proxmox.community | tail -22 packets transmitted, 2 received, 0% packet loss, time 1002msrtt min/avg/max/mdev = 0.503/1.300/2.097/0.797 mscurl -skI https://desonas.proxmox.community/ui/ | grep -i "^date"; date -udate: Mon, 09 Nov 2026 14:04:49 GMTMon Nov 9 02:04:49 PM UTC 2026- The NAS has the static address
172.27.199.10and the namedesonas.proxmox.community. - The NAS time matches the nodes’; the only NTP server is
ntp.proxmox.community. - The
datipool is a two-disk mirror, online and error-free. - The datasets
dati/nfs,dati/smbanddati/iscsiexist, and so does the usersvc-pve, with SMB access only.
Final lab state
Section titled “Final lab state”- NAS
desonas.proxmox.community(172.27.199.10), TrueNAS Community Edition 25.10.8:- system on the 32 GB disk (
boot-pool); administratortruenas_admin; - time zone
Europe/Rome, Italian keyboard, NTPntp.proxmox.community, DNS172.27.199.20, gateway172.27.199.1, proxyhttp://proxy.proxmox.community:3128; - pool
dati: mirror of the two 100 GiB disks, 95.44 GiB usable, LZ4 compression; - datasets
dati/nfs(Generic),dati/smb(SMB) anddati/iscsi(Generic), still without shares; - user
svc-pvewith SMB access.
- system on the 32 GB disk (
- Cluster and VMs unchanged.
What you learned
Section titled “What you learned”- TrueNAS Community Edition is a NAS system based on Debian and ZFS: the system lives in a dedicated boot pool, the data in a separate pool.
- Without DHCP, the network is configured from the console, with an automatic rollback that protects against mistakes.
- Time zone and NTP must be fixed right away; the default NTP servers are on the Internet.
- A pool is created with a wizard: layout, disk size, width and number of vdevs.
- NFS, SMB and iSCSI are best given a separate dataset each; the SMB preset prepares permissions suited to Windows.
- Proxmox VE accesses the NAS with a dedicated service user that has only the permissions it needs.