

Lab 03 – Installing Proxmox VE 9.2 (ZFS RAID1 and ext4)
Dependencies
Section titled “Dependencies”- Previous labs: Lab 01, Lab 02. DNS must already contain the records of
desopve01…desopve04. - Servers:
desopve01,desopve02anddesopve03(4 cores, 32 GB, 2 × 50 GB + 2 × 60 GB disks, 3 network cards) anddesopve04(4 cores, 16 GB, only the 50 GB system disk, 2 network cards), with VT-x/AMD-V enabled in the firmware. This is the lab hardware at the start of the course: the other disks and cards arrive in the labs that use them. - ISO:
proxmox-ve_9.2-1.iso, with its SHA-256 checksum verified, on a USB stick or on the virtual media of the management controller. - Addresses: from
172.27.199.21to172.27.199.24, gateway172.27.199.1, DNS172.27.199.20. - Credentials:
<lab-password>forroot→ Appendix B.
Objectives
Section titled “Objectives”- Install Proxmox VE 9.2 on three nodes with the system on ZFS RAID1 (mirror).
- Install the fourth node on ext4 with LVM-thin, to compare the two layouts.
- Understand what the installer creates: ZFS pool or LVM volume group,
localstorage,vmbr0bridge, network interface names. - Verify the installation from the command line.
How it works
Section titled “How it works”Proxmox VE is a Debian distribution (9.2 is based on Debian 13 “Trixie”) with its own kernel, QEMU/KVM for VMs, LXC for containers and a web interface on port 8006. In a few minutes, the installer does what would take hours by hand: it partitions the disks, creates the file system, installs the packages and configures the network and the bootloader.
Which file system for the system disk
Section titled “Which file system for the system disk”The installer offers ext4, xfs, ZFS and Btrfs. These are the two most common choices:
| ZFS (RAID1) | ext4 + LVM-thin | |
|---|---|---|
| Disks | at least 2 | 1 is enough |
| System redundancy | yes (mirror) | no, unless you have hardware RAID |
| VM snapshots | yes, native (zvol) | yes, with LVM-thin |
| Memory | uses RAM as a cache (ARC) | minimal usage |
| Storage created | local (directory) + local-zfs |
local (directory) + local-lvm (LVM-thin) |
| Hardware RAID compatibility | no: ZFS wants “bare” disks | yes |
In the lab, the cluster nodes use ZFS RAID1 on the two 50 GB disks: if a disk fails, the node keeps running (you will try a disk failure in a redundant pool in lab 10). The two 60 GB disks stay free for Ceph (lab 17). desopve04 uses ext4: this is the configuration of a server with a single disk or with a hardware RAID controller.
Pinned network interface names (new in 9.x)
Section titled “Pinned network interface names (new in 9.x)”On Linux, network interface names (for example enp65s0f0) derive from the position of the card on the PCI bus and can change after a kernel or firmware update, breaking the network configuration. The Proxmox VE 9.2 installer has the Pin network interface names option, enabled by default: it assigns stable names nic0, nic1, nic2… tied to the card’s MAC address, through systemd .link files in /usr/local/lib/systemd/network/.
Procedure
Section titled “Procedure”1. Install desopve01 on ZFS RAID1
Section titled “1. Install desopve01 on ZFS RAID1”-
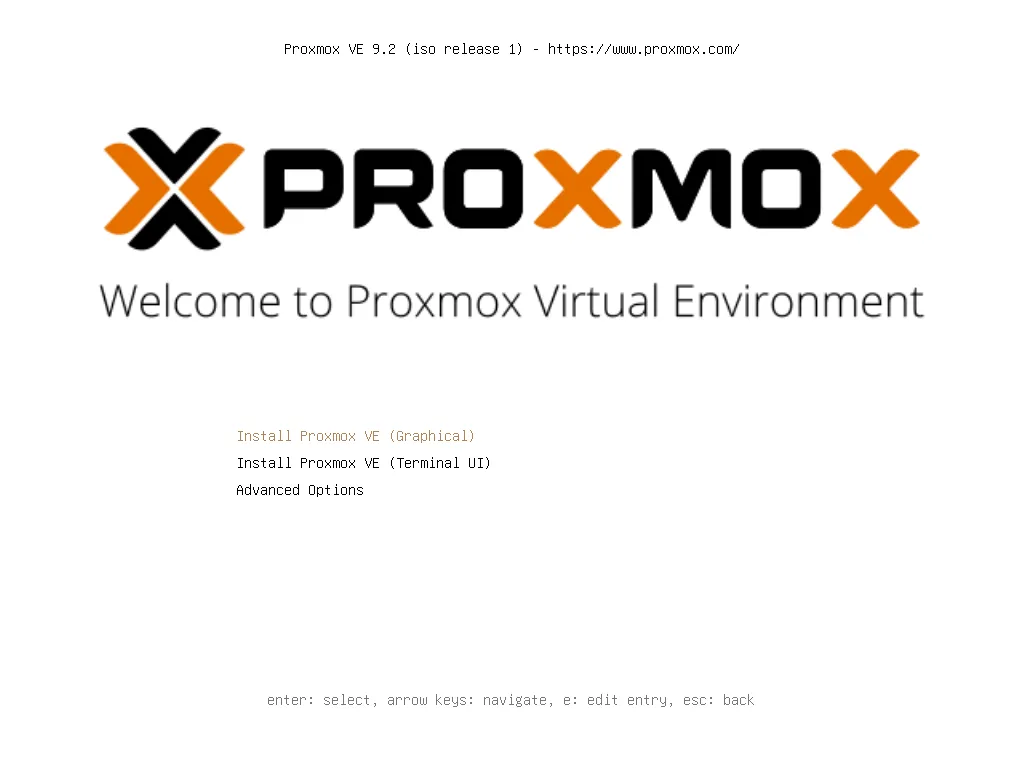
Boot the server from the USB stick with the ISO (or from the virtual media of the management controller) and choose Install Proxmox VE (Graphical).
-
Accept the license with I agree.

-
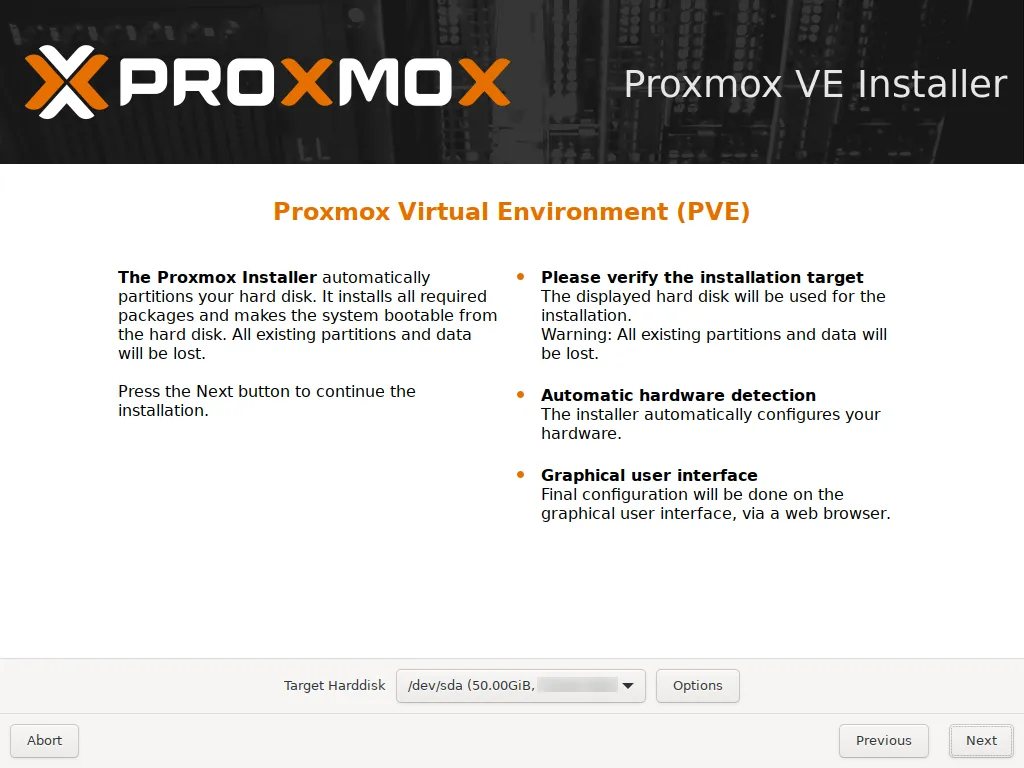
On the target disk screen, click Options: for a configuration with several disks, that is where you make the choice.
-
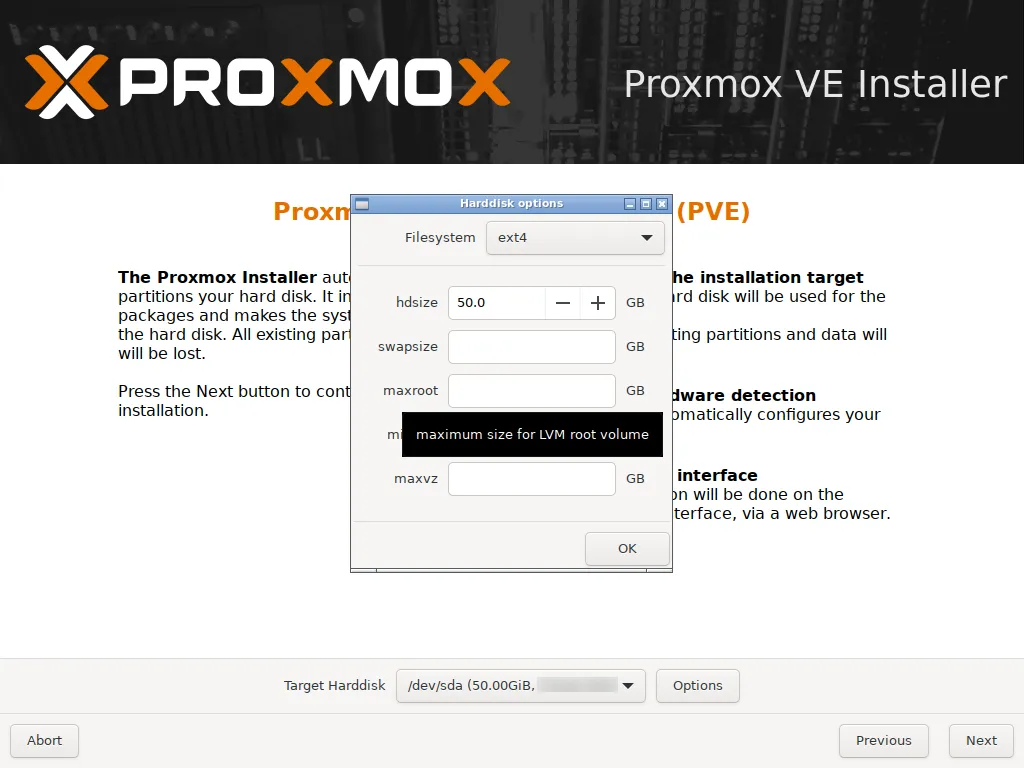
The default file system is ext4 on a single disk.
-
Set Filesystem to
zfs (RAID1). Leave Harddisk 0 and Harddisk 1 selected (the two 50 GB disks) and set the other two to-- do not use --: the 60 GB disks are for Ceph. Click OK and then Next.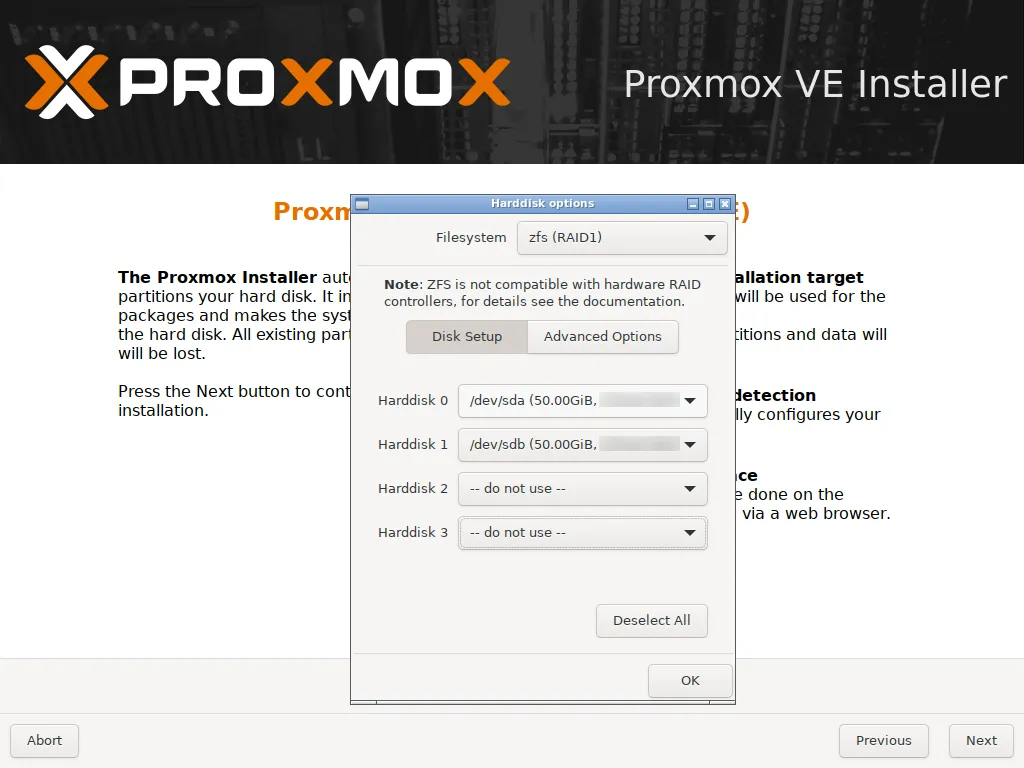
-
Set Country to
Italy, Time zone toEurope/Romeand Keyboard Layout toItalian.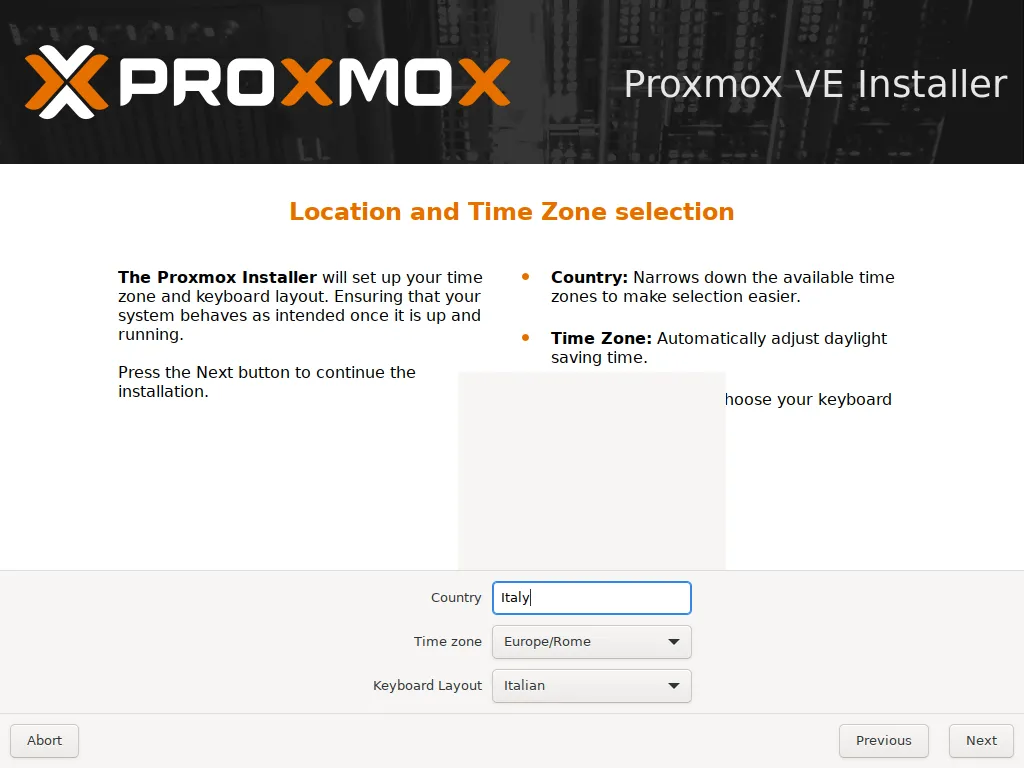
-
Enter the
rootpassword (<lab-password>) twice and the email address to which the node will send alerts ([email protected]).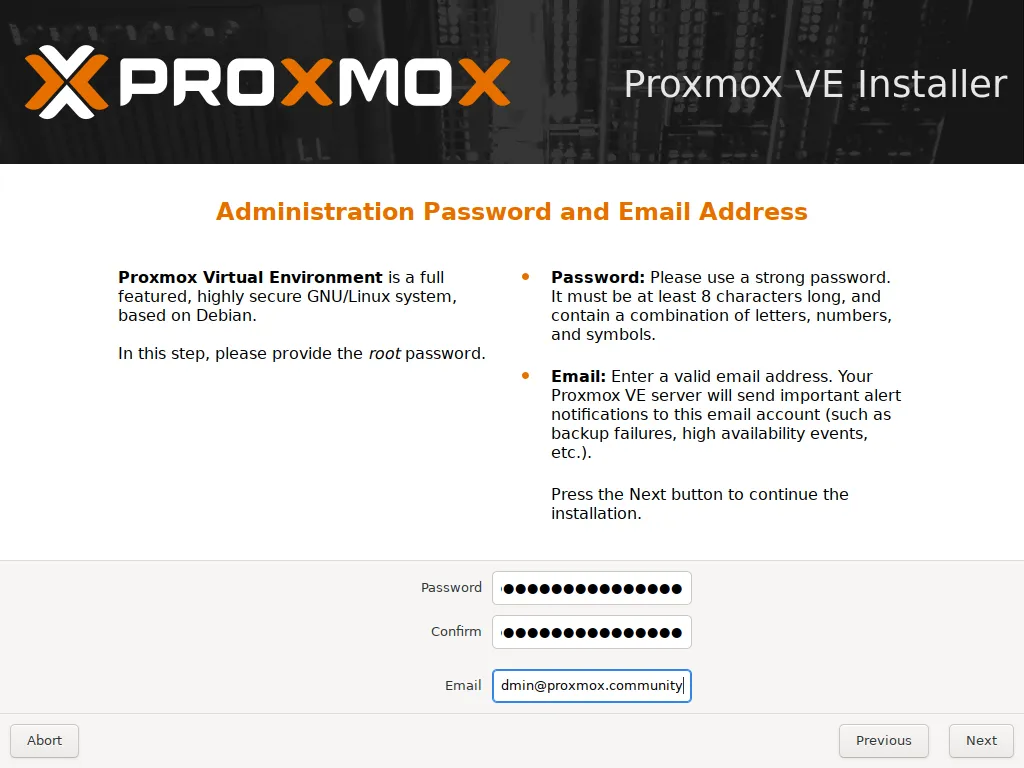
-
Configure the management network:
Field Value Management Interface nic0Hostname (FQDN) desopve01.proxmox.communityIP Address (CIDR) 172.27.199.21/24Gateway 172.27.199.1DNS Server 172.27.199.20Leave Pin network interface names checked.
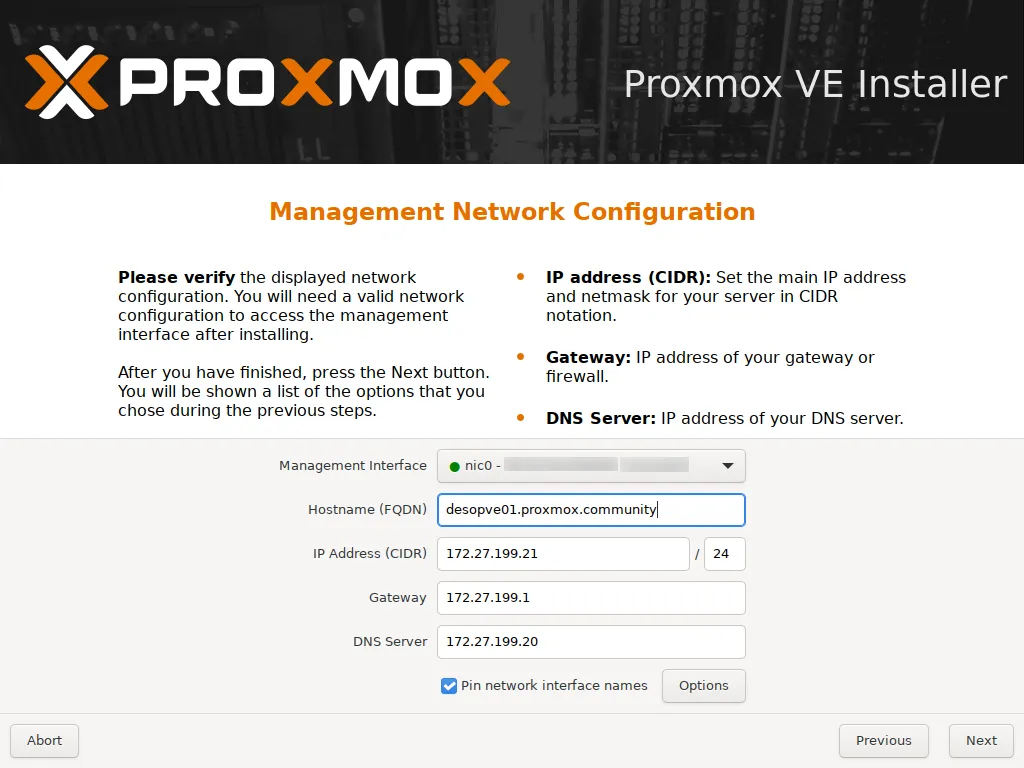
-
Check the summary. Uncheck Automatically reboot after successful installation if you need to remove the USB stick (or unmount the virtual media) before the reboot, then click Install.
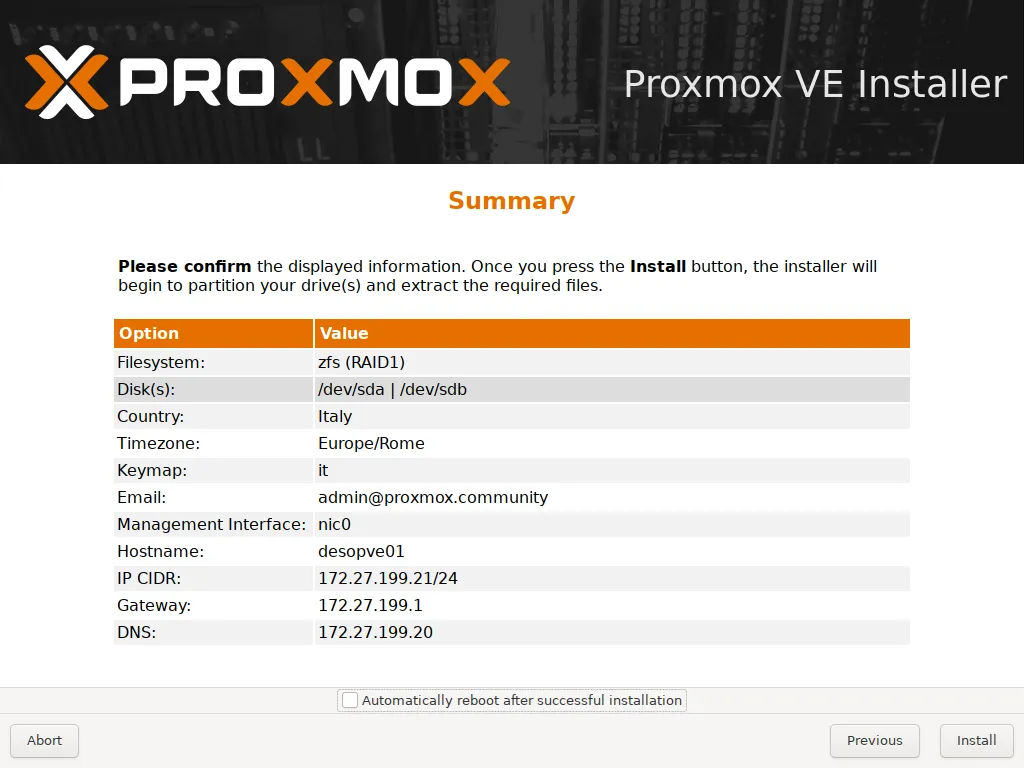
-
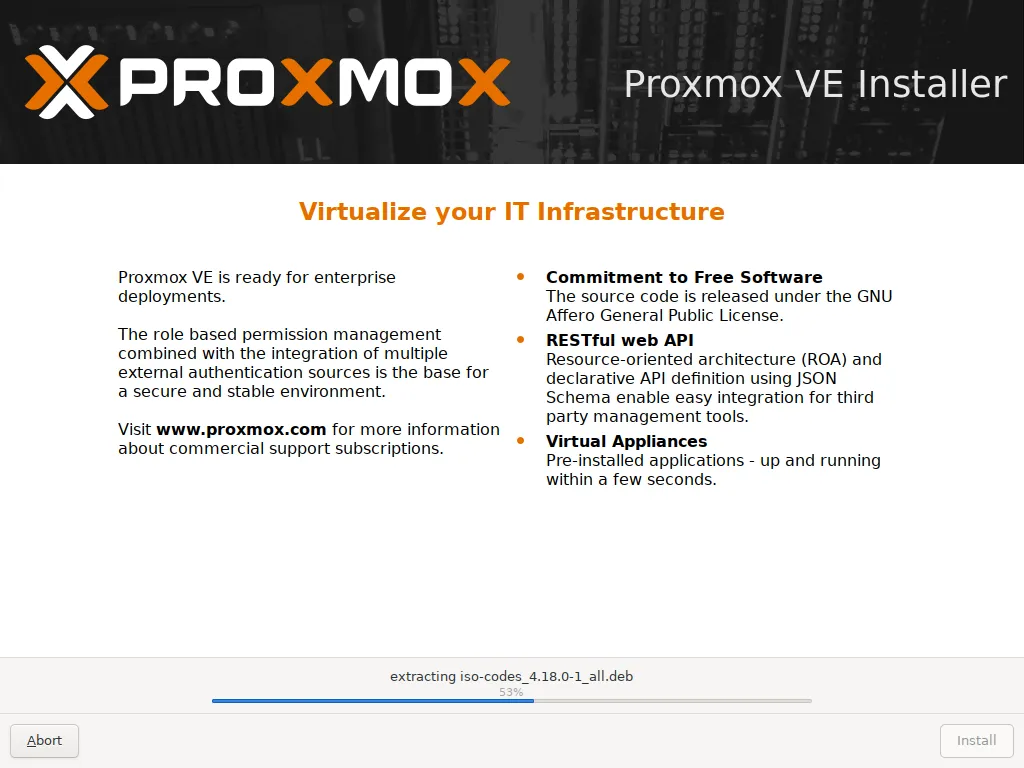
The installation takes a few minutes.
-
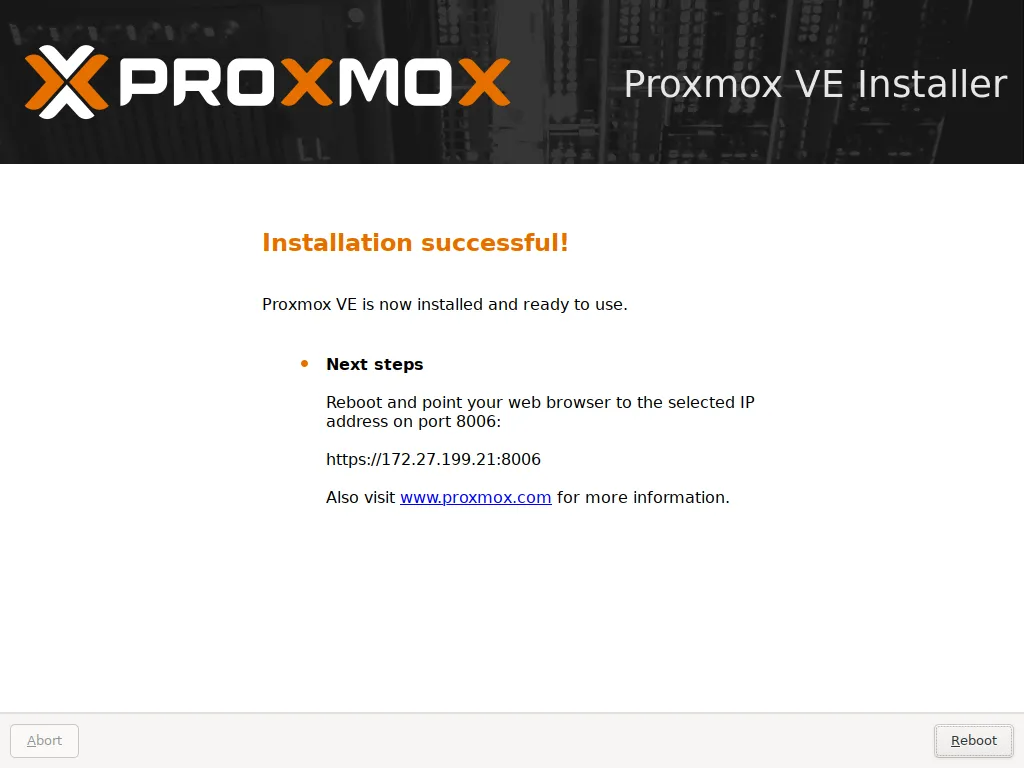
When it finishes, the installer shows the address of the web interface. Remove the USB stick (or unmount the virtual media) and click Reboot.
-
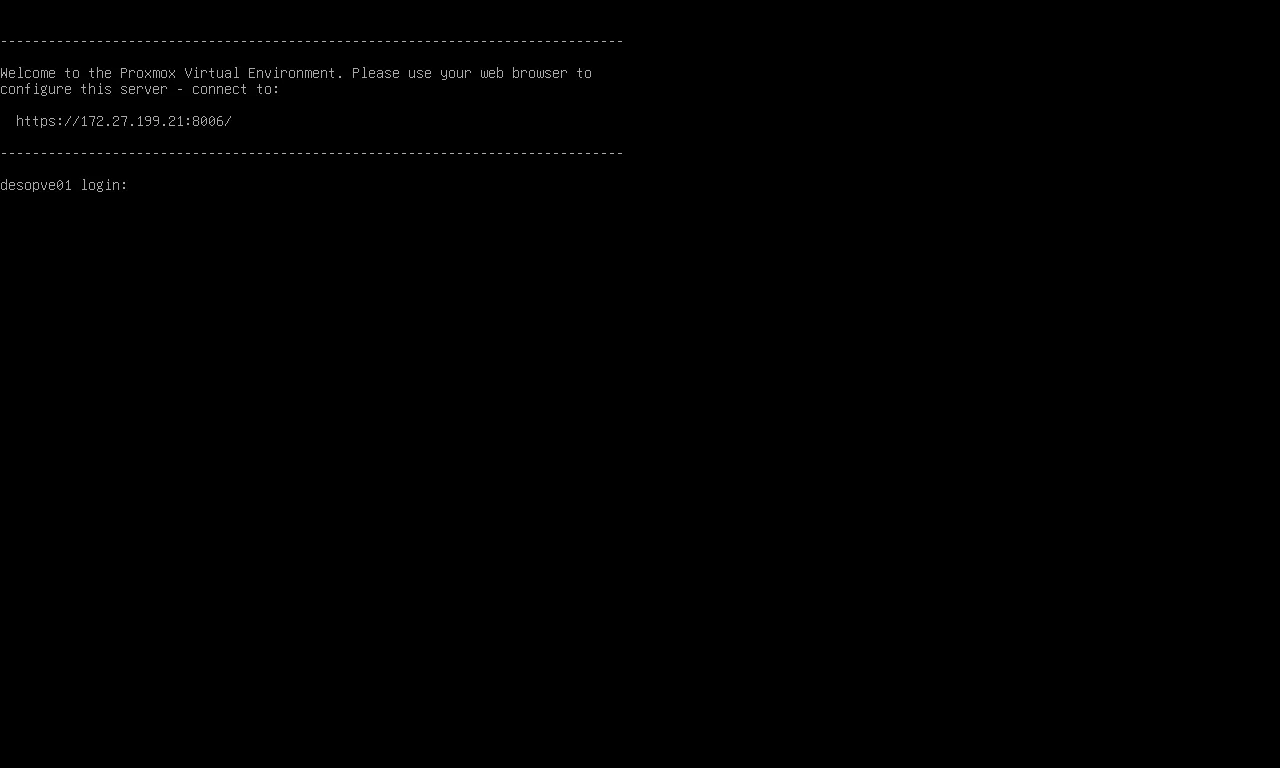
After the reboot, the console shows the web interface address and the login prompt.
2. Install desopve02 and desopve03
Section titled “2. Install desopve02 and desopve03”Repeat the procedure of step 1, changing only the name and the address:
| Node | Hostname (FQDN) | IP Address (CIDR) |
|---|---|---|
| desopve02 | desopve02.proxmox.community |
172.27.199.22/24 |
| desopve03 | desopve03.proxmox.community |
172.27.199.23/24 |
3. Install desopve04 on ext4
Section titled “3. Install desopve04 on ext4”Repeat the procedure with these differences:
-
In Options, leave Filesystem set to
ext4on the single 50 GB disk (/dev/sda): the hot-swap bays stay empty, and the 20 GB disks arrive in lab 09. Thehdsize,swapsize,maxroot,minfreeandmaxvzfields (in the screenshot a tooltip covers theminfreelabel) stay empty: the installer calculates the sizes by itself. -
Hostname
desopve04.proxmox.community, address172.27.199.24/24.
4. Check the name of each node
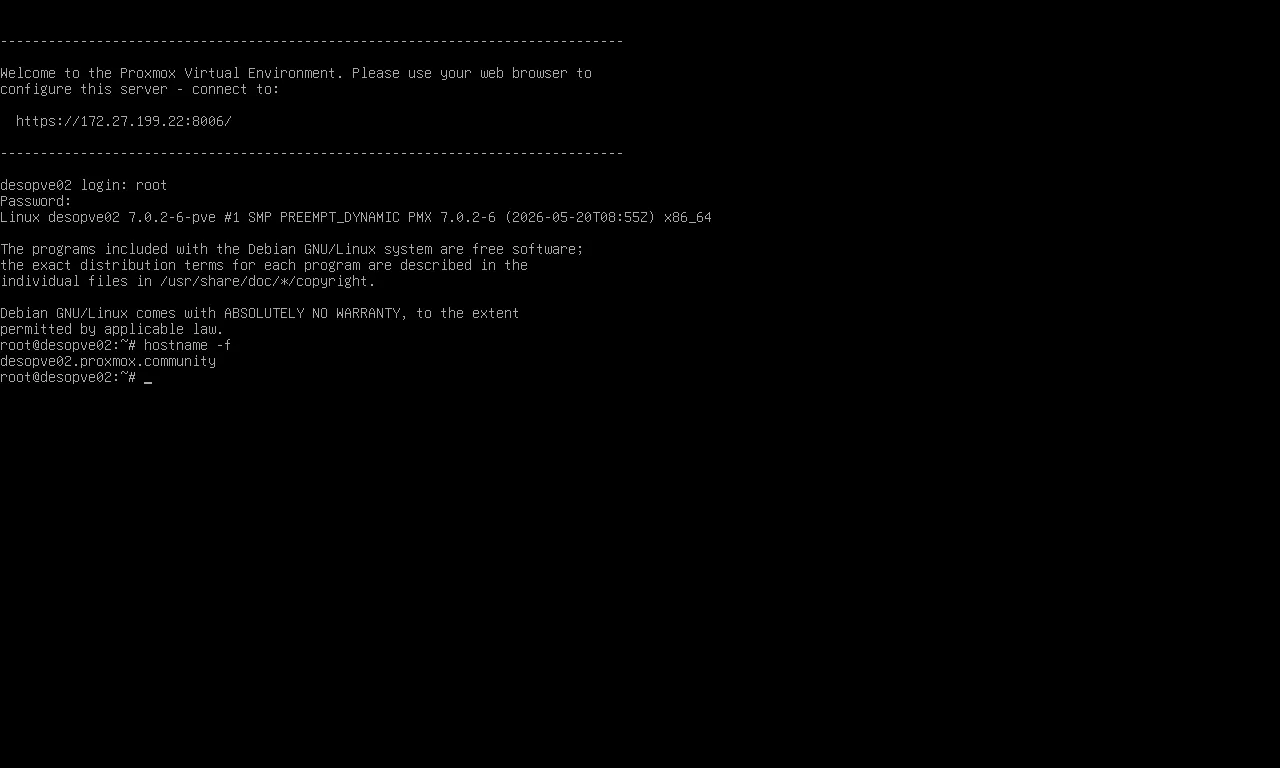
Section titled “4. Check the name of each node”After the reboot, log in at the console as root and check the full name with hostname -f: it must contain the proxmox.community domain. For example, on desopve02:
Verification and tests
Section titled “Verification and tests”Connect to each node over SSH as root (or from the console) and check the following.
Name and version:
hostname -fdesopve01.proxmox.communitypveversionpve-manager/9.2.2/b9984c6d90a4bd80 (running kernel: 7.0.2-6-pve)System ZFS pool (-L shows the disk names instead of the long identifiers):
zpool status -L rpool pool: rpool state: ONLINEconfig:
NAME STATE READ WRITE CKSUM rpool ONLINE 0 0 0 mirror-0 ONLINE 0 0 0 sda3 ONLINE 0 0 0 sdb3 ONLINE 0 0 0
errors: No known data errorszfs listNAME USED AVAIL REFER MOUNTPOINTrpool 2.00G 45.5G 96K /rpoolrpool/ROOT 2.00G 45.5G 96K /rpool/ROOTrpool/ROOT/pve-1 2.00G 45.5G 2.00G /rpool/data 96K 45.5G 96K /rpool/datarpool/var-lib-vz 96K 45.5G 96K /var/lib/vzrpool/ROOT/pve-1 is the system, rpool/data holds the VM disks (local-zfs storage) and rpool/var-lib-vz contains ISOs, templates and backups (local storage).
Booting from both disks. With ZFS RAID1 the installer creates an EFI boot partition on each disk and keeps them in sync with proxmox-boot-tool: the node boots even if the first disk fails.
proxmox-boot-tool statusRe-executing '/usr/sbin/proxmox-boot-tool' in new private mount namespace..System currently booted with uefiF98D-1B42 is configured with: uefi (versions: 7.0.2-6-pve)F990-B56D is configured with: uefi (versions: 7.0.2-6-pve)Storage created by the installer:
pvesm statusName Type Status Total (KiB) Used (KiB) Available (KiB) %local dir active 47723008 128 47722880 0.00%local-zfs zfspool active 47723048 96 47722952 0.00%On desopve04 (ext4) the storages are local and local-lvm, that is, the data thin pool of the pve LVM volume group:
pvesm statusName Type Status Total (KiB) Used (KiB) Available (KiB) %local dir active 22203544 4193740 16856576 18.89%local-lvm lvmthin active 14217216 0 14217216 0.00%lvs LV VG Attr LSize Pool Origin Data% Meta% Move Log Cpy%Sync Convert data pve twi-a-tz-- <13.56g 0.00 1.58 root pve -wi-ao---- 21.68g swap pve -wi-ao---- 6.12gNote the difference: on ZFS the space is shared between the system and the VMs, while with LVM the installer splits the disk into fixed partitions (root, swap, data).
Network. The management address is not on the physical card but on the vmbr0 bridge, to which nic0 is attached: VMs connected to vmbr0 go out on the same network as the node.
ip -br -4 addrlo UNKNOWN 127.0.0.1/8vmbr0 UP 172.27.199.21/24cat /etc/network/interfacesauto loiface lo inet loopback
iface nic0 inet manual
auto vmbr0iface vmbr0 inet static address 172.27.199.21/24 gateway 172.27.199.1 bridge-ports nic0 bridge-stp off bridge-fd 0
iface nic1 inet manual
iface nic2 inet manual
source /etc/network/interfaces.d/*ls /usr/local/lib/systemd/network/50-pmx-nic0.link 50-pmx-nic1.link 50-pmx-nic2.linkThe three .link files bind the names nic0…nic2 to the MAC addresses of the cards.
Virtualization extensions. The node must see the processor’s virtualization extensions and the /dev/kvm device, otherwise it cannot start VMs:
grep -c -E 'vmx|svm' /proc/cpuinfo8ls -la /dev/kvmcrw-rw---- 1 root kvm 10, 232 Nov 9 10:33 /dev/kvmA result of 0 means that VT-x/AMD-V is disabled in the server firmware (BIOS/UEFI): enable it and reboot, as described in Lab 01.
If hostname -f shows a different domain
Section titled “If hostname -f shows a different domain”This can happen if you go back in the installer and change the name after you have already confirmed it. Fix /etc/hosts before creating the cluster and regenerate the web interface certificate:
sed -i 's/vecchio-dominio/proxmox.community/g' /etc/hosts /etc/resolv.conf /etc/postfix/main.cfpvecm updatecerts --force(re)generate node filesgenerate new node certificatesystemctl restart pveproxyopenssl x509 -in /etc/pve/local/pve-ssl.pem -noout -ext subjectAltNameX509v3 Subject Alternative Name: IP Address:127.0.0.1, IP Address:0:0:0:0:0:0:0:1, DNS:localhost, IP Address:172.27.199.21, DNS:desopve01, DNS:desopve01.proxmox.communitySummary of the checks:
-
hostname -freturns the full name inproxmox.communityon all four nodes. -
pveversionshowspve-manager/9.2.x. - On
desopve01…03,rpoolisONLINEas a mirror of two disks; ondesopve04,local-lvmexists. - The management address is on
vmbr0, and the interfaces are namednic0,nic1, … -
/dev/kvmexists.
Final lab state
Section titled “Final lab state”- Four independent Proxmox VE 9.2 nodes (not yet in a cluster), reachable at
https://desopve0N.proxmox.community:8006. desopve01…03: system on ZFS RAID1 (rpool), 60 GB disks free.desopve04: system on ext4 with LVM-thin.- Only
nic0is configured (vmbr0bridge); the other cards are free for the following labs.
What you learned
Section titled “What you learned”- How to install Proxmox VE and what the installer decides for you.
- The practical differences between ZFS RAID1 and ext4/LVM-thin for the system disk.
- Why Proxmox VE 9 pins network interface names and where it stores this mapping.
- That the management address lives on a bridge, not on the physical card.