

Lab 02 – Windows Server 2025 domain controller: Active Directory, DNS and NTP
Dependencies
Section titled “Dependencies”- Previous labs: Lab 01 – Lab architecture.
- Server:
desopve-dc01powered off: 4 cores, 8 GB of RAM, 90 GB and 300 GB disks, two network cards, UEFI firmware with Secure Boot (see the lab hardware). - ISO: Windows Server 2025 Evaluation (
26100.1742…SERVER_EVAL_x64FRE_en-us.iso), on a USB stick or on the virtual media of the management controller. - Services:
netsvcrunning on172.27.199.250, with HTTP proxy (port 3128) and NTP. - Addresses:
172.27.199.20(management network) and172.32.199.20(cluster/storage network). - Credentials:
<lab-password>for Administrator and for Directory Services Restore Mode (DSRM) → Appendix B.
Objectives
Section titled “Objectives”- Install Windows Server 2025 with the graphical interface.
- Configure the network, the time zone and Remote Desktop.
- Create the
proxmox.communityActive Directory forest with integrated DNS. - Register all the lab servers in DNS, with reverse lookup zones.
- Synchronize the domain time with the lab NTP server.
- Configure the system HTTP proxy.
How it works
Section titled “How it works”A Proxmox VE cluster also works without Active Directory, but three services of the domain controller make the rest of the manual simpler.
- DNS. The nodes are reached by name (
desopve01.proxmox.community), and the web interface certificates, the cluster and shared storage work better with names that resolve in both directions: name → address and address → name (reverse zones). - Active Directory. In track D (lab 43), Proxmox VE will use the domain users and groups for access to the web interface.
- Accurate time. Corosync, Ceph, Kerberos and certificates are sensitive to clock skew. In the lab, time follows this chain:
flowchart LR
    INET(("Public NTP servers")) --> SVC["netsvc<br/>ntp.proxmox.community"]
    SVC --> DC["desopve-dc01<br/>(PDC emulator)"]
    SVC --> PVE["Proxmox VE nodes<br/>(lab 04)"]
    DC --> WIN["domain members"]
The DNS server is authoritative for proxmox.community
Section titled “The DNS server is authoritative for proxmox.community”The lab domain is proxmox.community, the same name as the public website. The domain controller becomes authoritative for that zone: for every name ending in proxmox.community it answers only with the records it knows.
A name that exists on the Internet but not in the internal zone (for example www.proxmox.community) therefore does not exist for the lab servers. If you need public names from the same domain, add them manually to the internal zone. This is the configuration known as split DNS: the same domain name has different content inside and outside the company.
No DNS forwarders
Section titled “No DNS forwarders”The domain controller’s DNS server does not forward queries to the Internet: the lab has no direct Internet access. Public names (for example deb.debian.org) are resolved by the proxy, when a server requests a page through proxy.proxmox.community:3128.
Procedure
Section titled “Procedure”1. Install Windows Server 2025
Section titled “1. Install Windows Server 2025”-
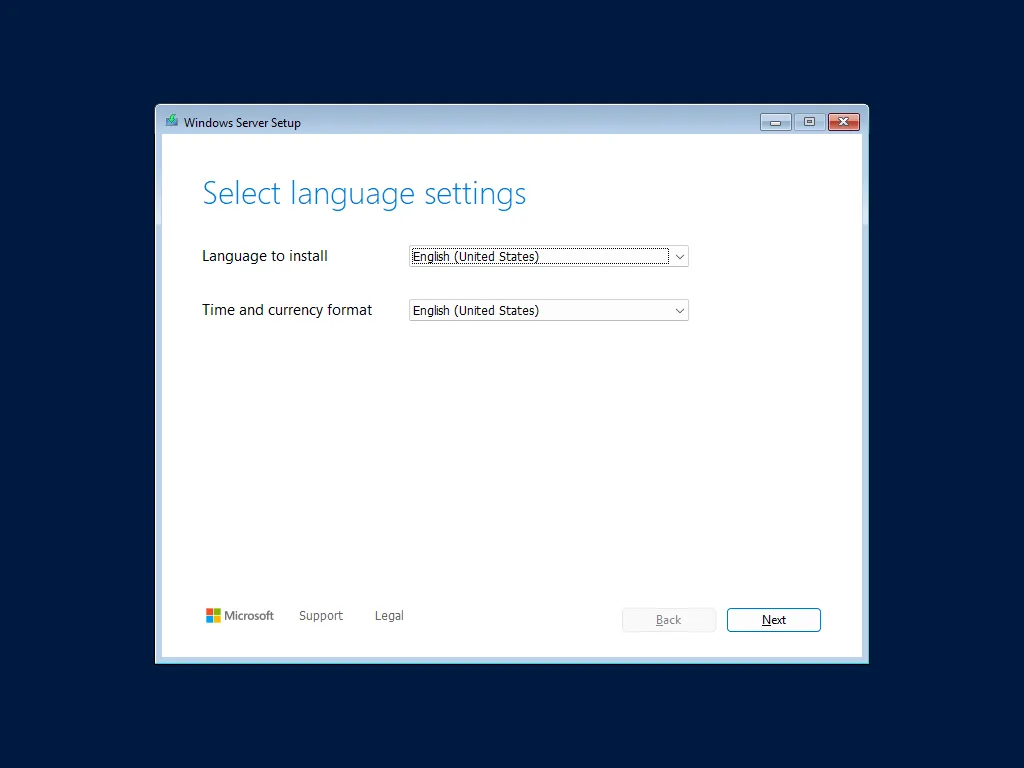
Boot the server from the USB stick (or from the virtual media of the management controller). At the Press any key to boot from CD or DVD prompt, press a key. On the first screen, leave English (United States) as the language and format, then click Next.
-
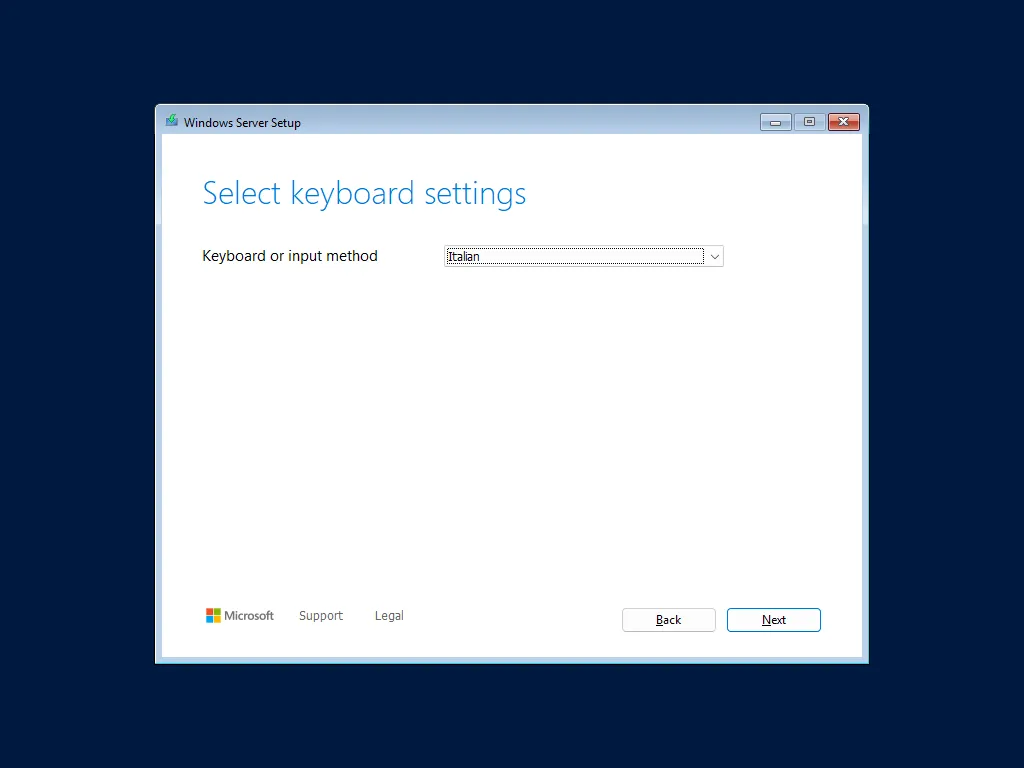
Choose the Italian keyboard layout and click Next.
-
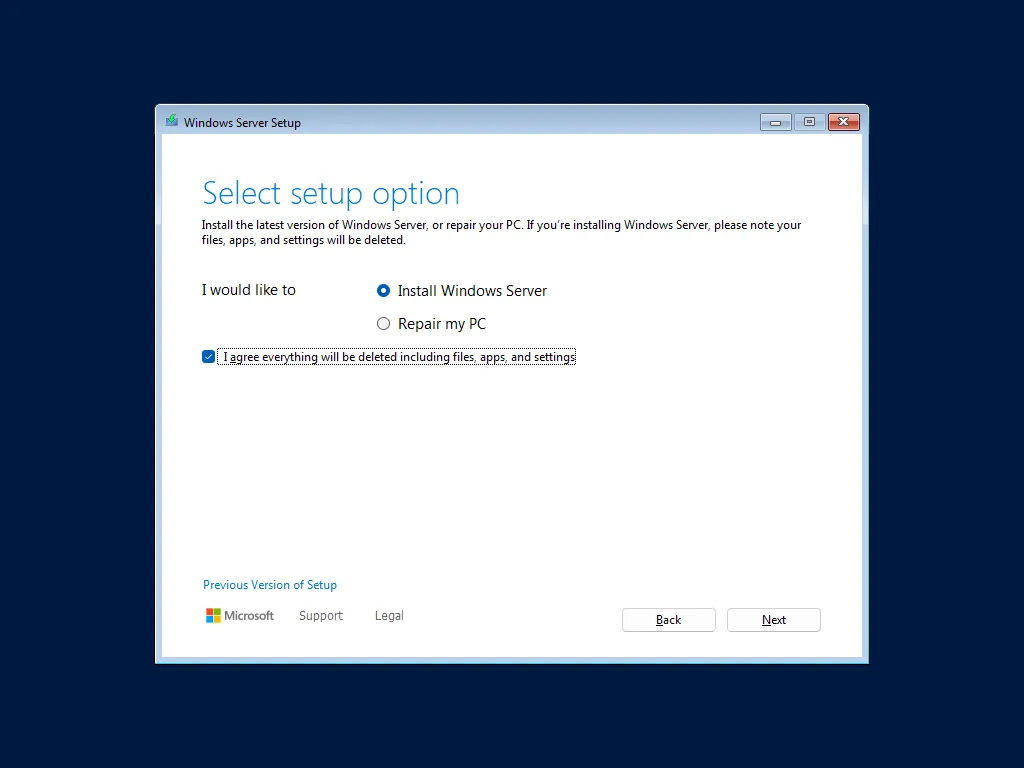
Select Install Windows Server, check I agree everything will be deleted including files, apps, and settings and click Next.
-
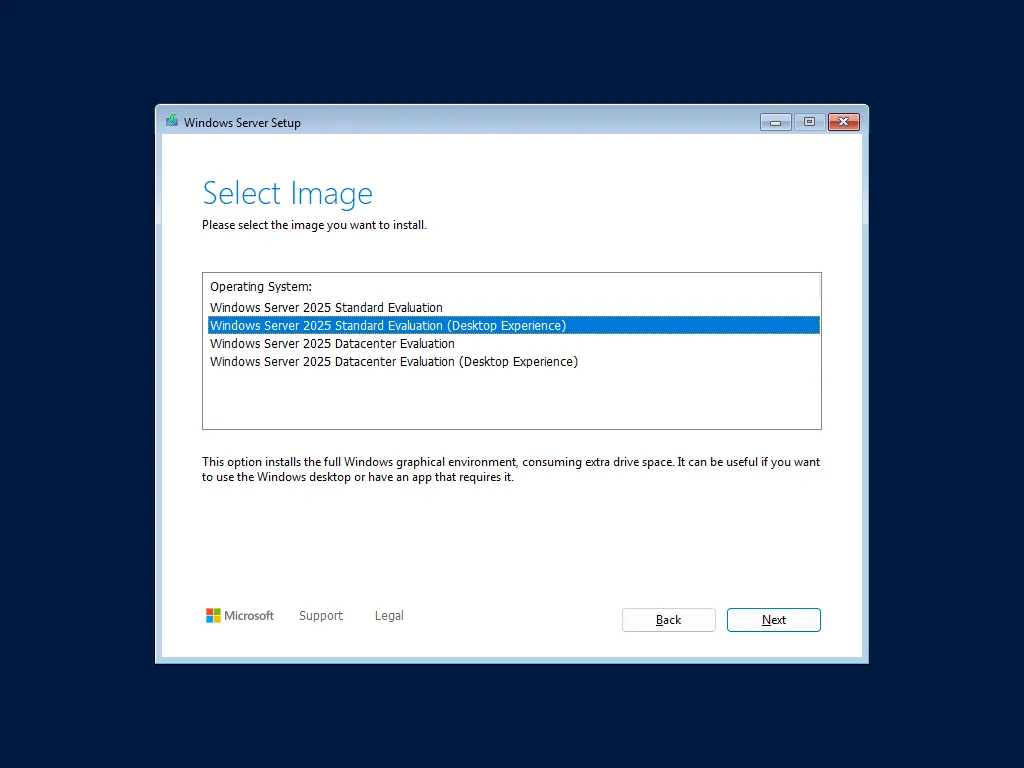
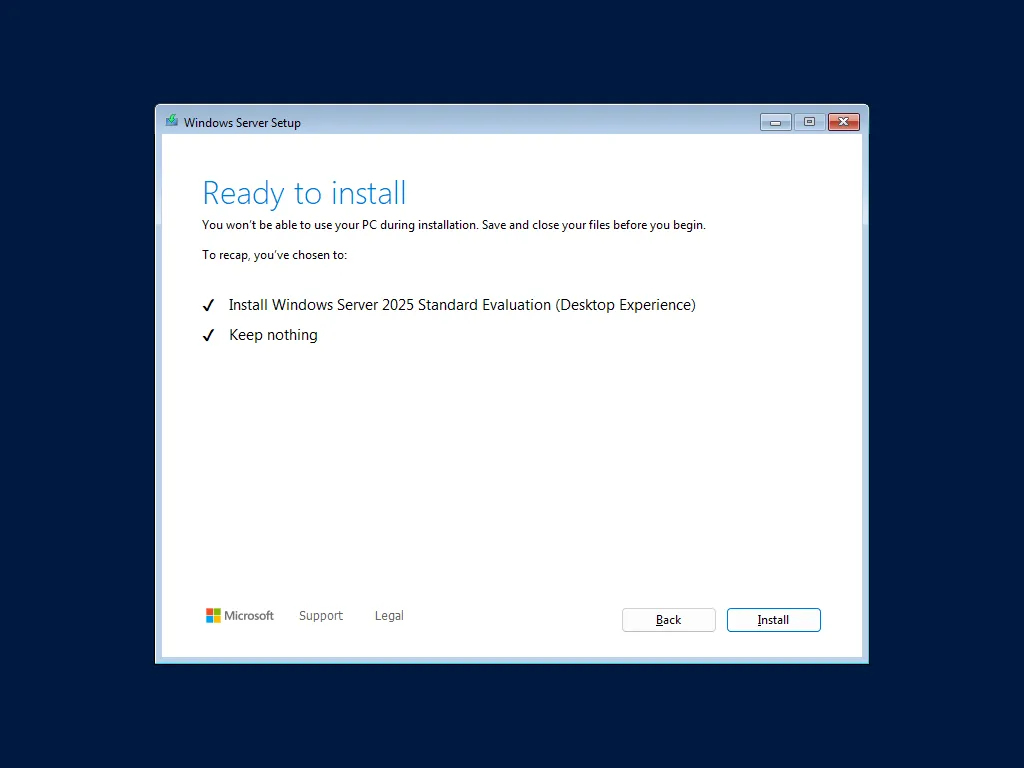
Choose the Windows Server 2025 Standard Evaluation (Desktop Experience) edition. The edition without Desktop Experience is Server Core, with no graphical interface.
-
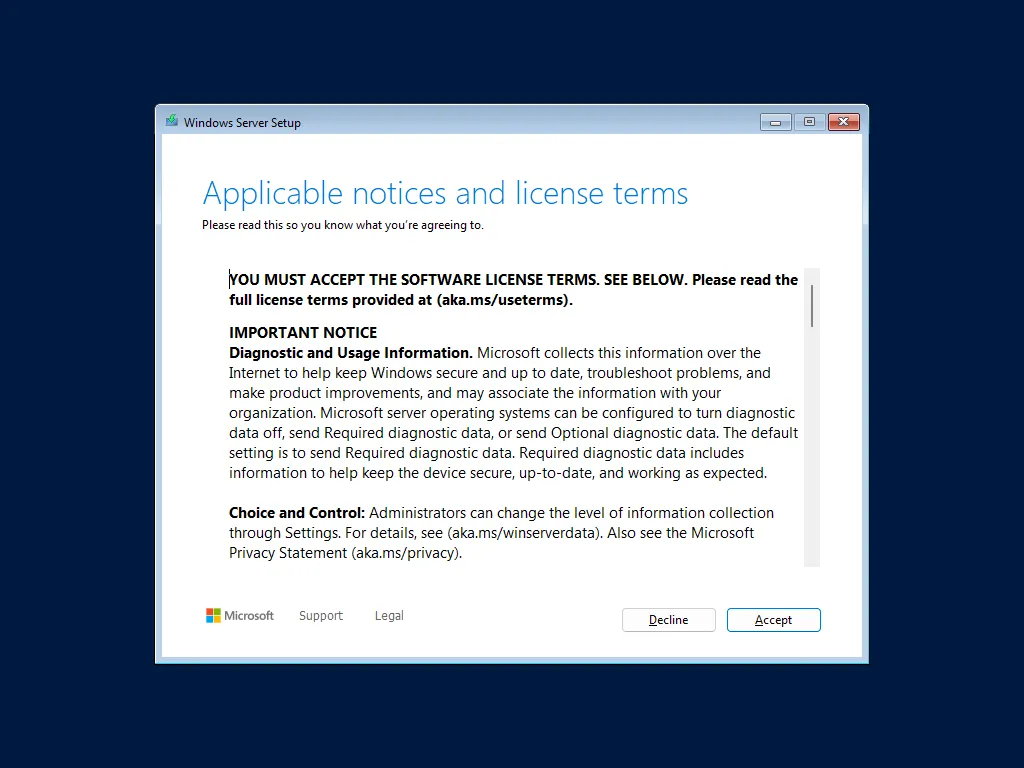
Accept the license terms with Accept.
-
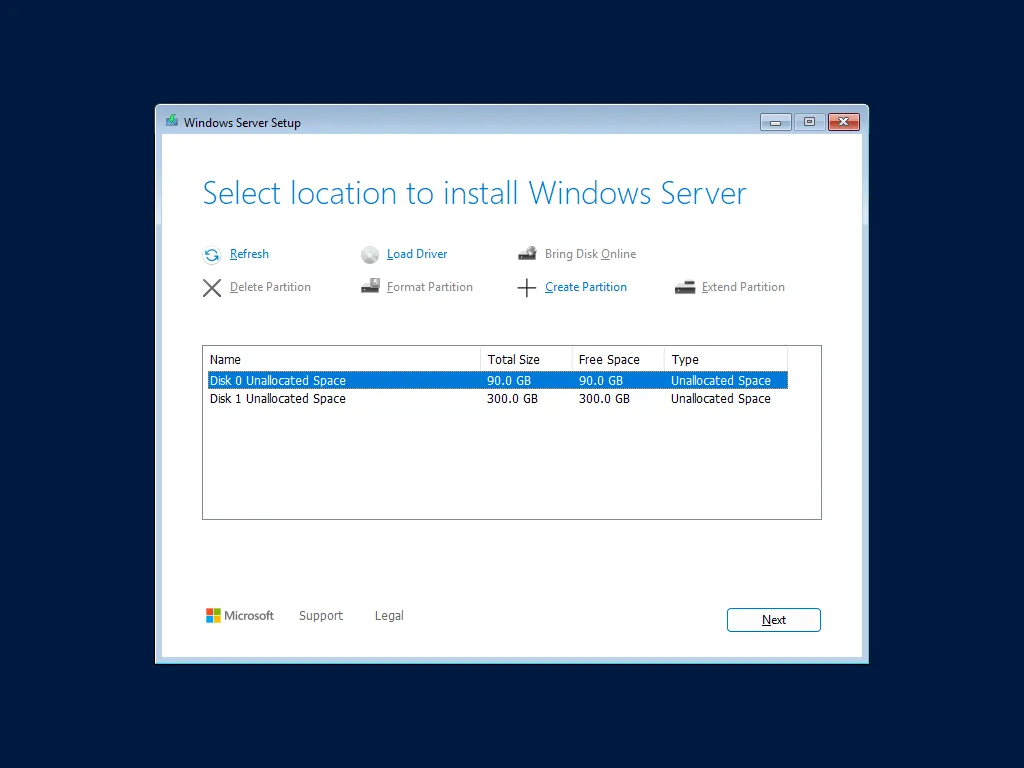
Select Disk 0 (90 GB) as the target and click Next. The 300 GB disk stays free: no lab uses it, so you can also leave it out.
-
Check the summary and click Install.
-
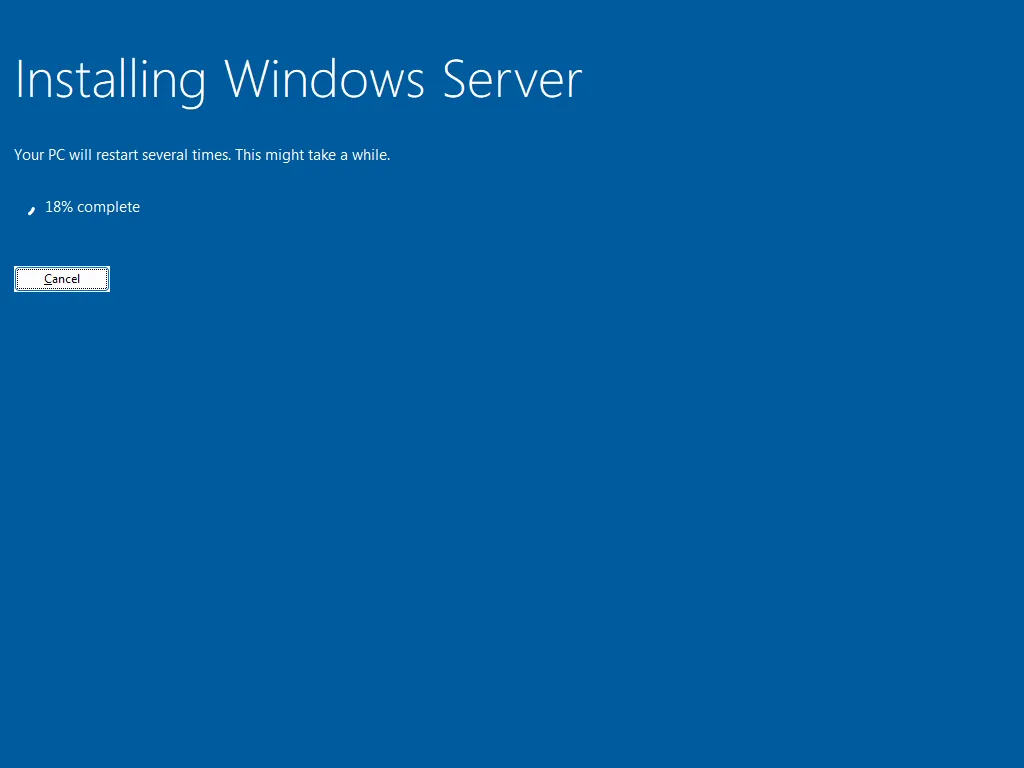
Wait for the installation to finish: the server restarts by itself, possibly several times.
2. First sign-in
Section titled “2. First sign-in”-
Set the Administrator password (
<lab-password>) in both fields and click Finish.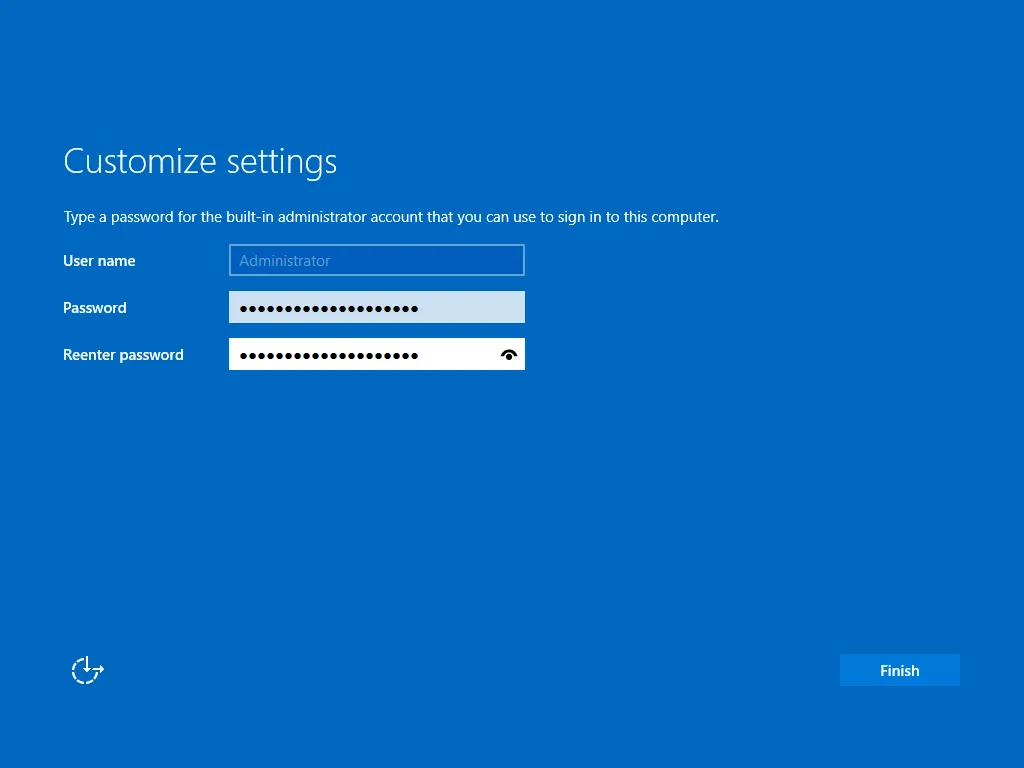
-
Sign in as Administrator (Ctrl+Alt+Del). When asked about diagnostic data, choose Required only.
-
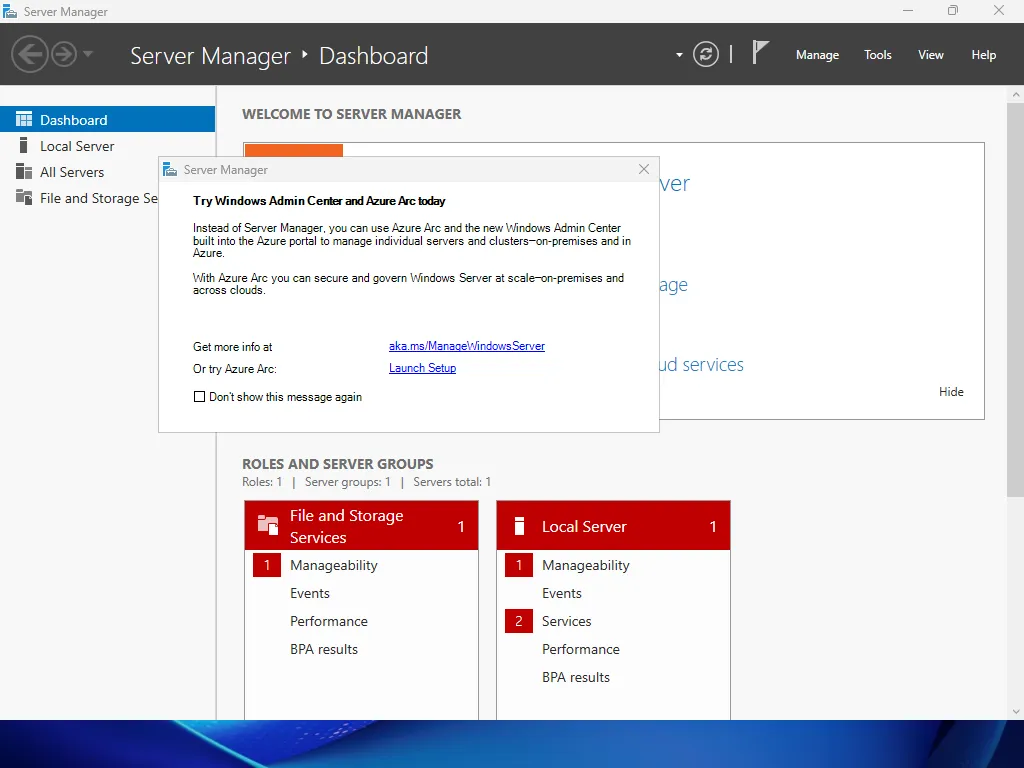
Server Manager, the server management console, opens. Close the pane that offers Windows Admin Center and Azure Arc.
3. Network, Remote Desktop and server name
Section titled “3. Network, Remote Desktop and server name”Run these commands in a PowerShell window opened as administrator (right-click the Start button → Terminal (Admin)).
-
List the network adapters:
Terminal window Get-NetAdapter | Format-Table Name, InterfaceDescription, Status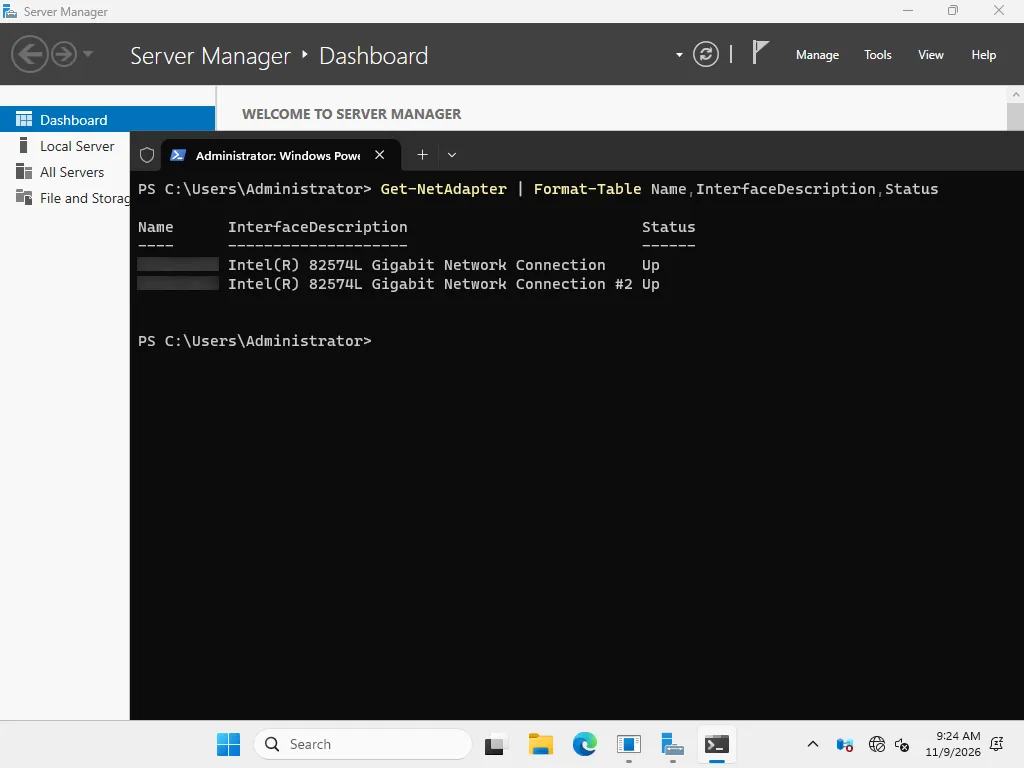
Windows gives the adapters generic names that depend on the hardware: shortly we will rename them after their role. In the lab, the first adapter by index is connected to the management network, the second to the cluster/storage network. If the order is different in your lab, swap the two adapters in the following commands.
-
Assign the static addresses. The management adapter uses itself (
127.0.0.1) as its DNS server, because this server will shortly become the domain DNS server:Terminal window $if = (Get-NetAdapter | Sort-Object ifIndex | Select-Object -First 1).NameNew-NetIPAddress -InterfaceAlias $if -IPAddress 172.27.199.20 -PrefixLength 24 -DefaultGateway 172.27.199.1Set-DnsClientServerAddress -InterfaceAlias $if -ServerAddresses 127.0.0.1$if2 = (Get-NetAdapter | Sort-Object ifIndex | Select-Object -Skip 1 -First 1).NameNew-NetIPAddress -InterfaceAlias $if2 -IPAddress 172.32.199.20 -PrefixLength 24New-NetIPAddressshows the address it has just assigned; theTentativestate becomesPreferredafter a few seconds, once Windows has verified that the address is not already in use.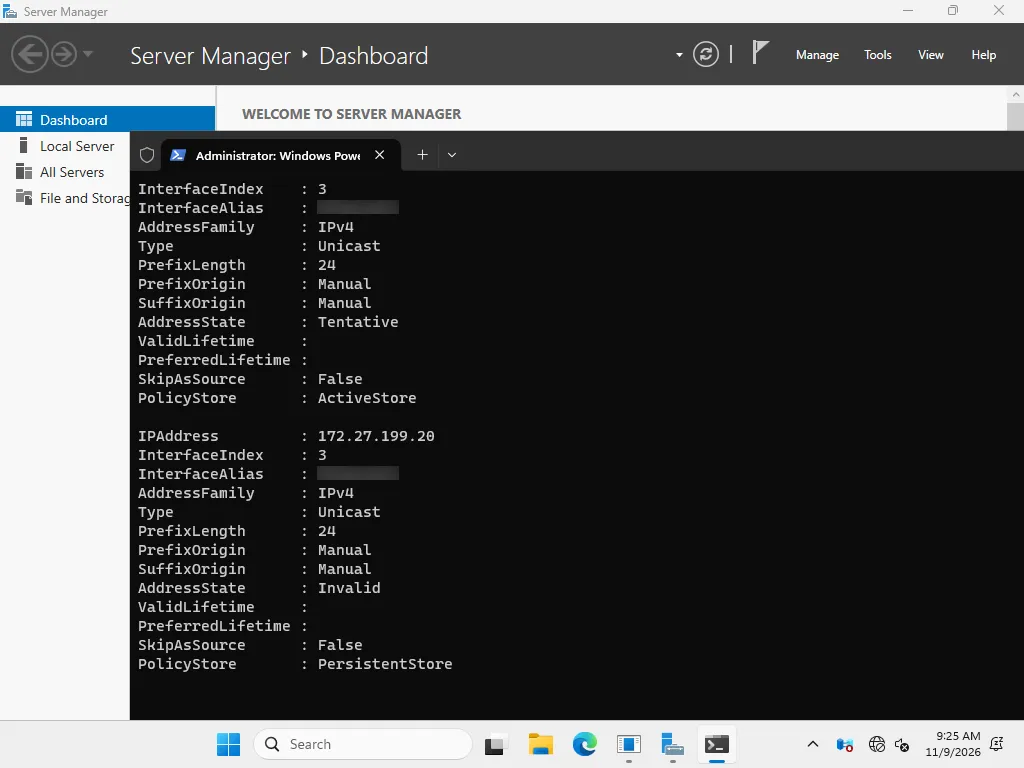
-
Enable Remote Desktop and its firewall rule:
Terminal window Set-ItemProperty -Path "HKLM:\SYSTEM\CurrentControlSet\Control\Terminal Server" -Name fDenyTSConnections -Value 0Enable-NetFirewallRule -DisplayGroup "Remote Desktop" -
Rename the server and restart it:
Terminal window Rename-Computer -NewName desopve-dc01 -Restart
From here on you can work over Remote Desktop (mstsc) to 172.27.199.20 from the administration PC connected to the management network (see Administration workstation), which is more convenient than the console.
-
Set the Italian time zone. The English installation starts with the Pacific time zone:
Terminal window Set-TimeZone -Id "W. Europe Standard Time"Get-TimeZone | Format-List Id, DisplayName
-
Rename the network adapters after their role:
MGMTfor management,CLUSTERfor the cluster/storage network. On theCLUSTERadapter, disable DNS registration, so that the server name resolves only to the management address:Terminal window Rename-NetAdapter -Name (Get-NetIPAddress -IPAddress 172.27.199.20).InterfaceAlias -NewName MGMTRename-NetAdapter -Name (Get-NetIPAddress -IPAddress 172.32.199.20).InterfaceAlias -NewName CLUSTERSet-DnsClient -InterfaceAlias CLUSTER -RegisterThisConnectionsAddress $falseCheck the result:
Terminal window Get-NetAdapter | Format-Table Name, InterfaceDescription, Status, LinkSpeed -AutoSizeGet-NetIPConfiguration | Select-Object InterfaceAlias,@{n='IPv4';e={$_.IPv4Address.IPAddress}},@{n='Gateway';e={$_.IPv4DefaultGateway.NextHop}},@{n='DNS';e={$_.DNSServer.ServerAddresses -join ', '}} | Format-Table -AutoSizeGet-DnsClient -InterfaceAlias MGMT, CLUSTER | Format-Table InterfaceAlias, RegisterThisConnectionsAddress -AutoSize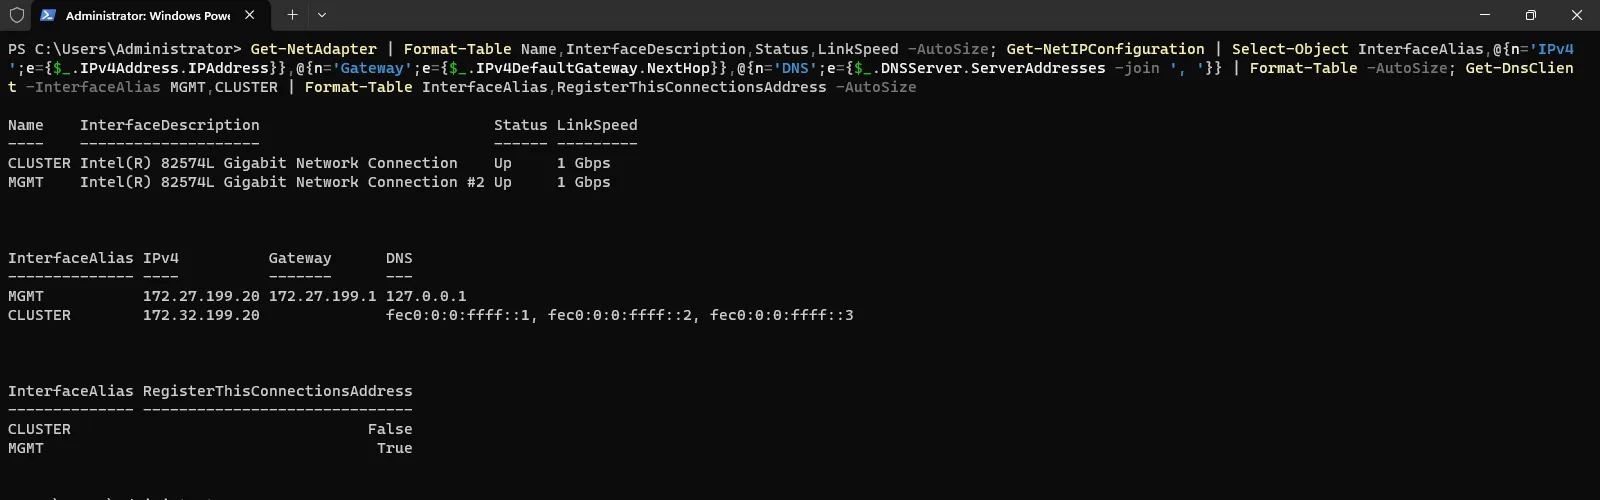
Giving the adapters names that say what they are for is a good habit: scripts and documentation stay clear even when the hardware changes.
4. Install Active Directory and create the forest
Section titled “4. Install Active Directory and create the forest”-
Install the Active Directory Domain Services role with the management tools:
Terminal window Install-WindowsFeature -Name AD-Domain-Services -IncludeManagementTools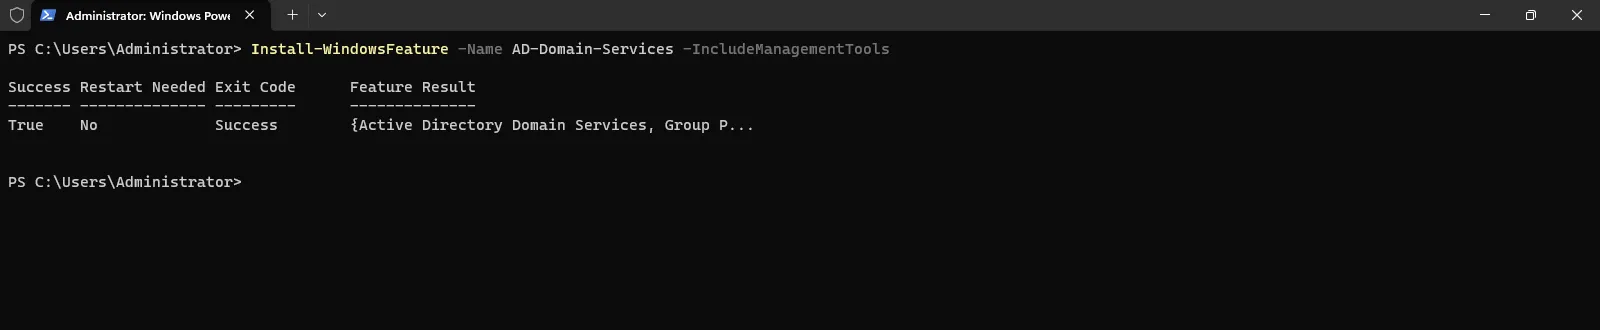
-
Create the new
proxmox.communityforest with integrated DNS. The NetBIOS name (PROXMOX) is the short name of the domain, used for example inPROXMOX\Administrator:Terminal window Install-ADDSForest -DomainName proxmox.community -DomainNetbiosName PROXMOX -InstallDns `-SafeModeAdministratorPassword (Read-Host -AsSecureString -Prompt "Password DSRM") -ForceAt the Password DSRM prompt, type
<lab-password>. It is the password of Directory Services Restore Mode, the local account used to repair Active Directory when the service does not start: in production, keep it in a safe place. -
The promotion checks the prerequisites, creates the directory partitions and configures DNS. When it finishes, the server restarts by itself.
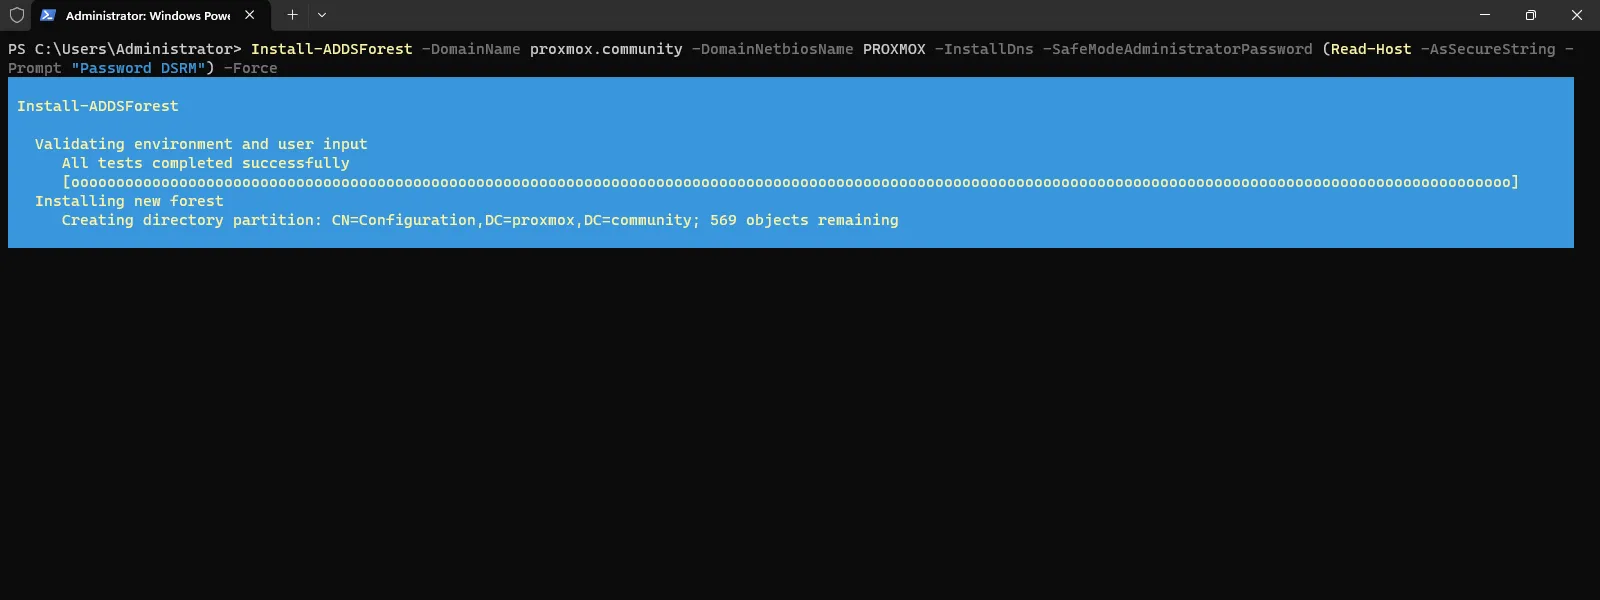
-
After the restart, sign in as
PROXMOX\Administrator. The first sign-in takes a few minutes (Please wait for the Group Policy Client). The AD DS and DNS roles appear in Server Manager.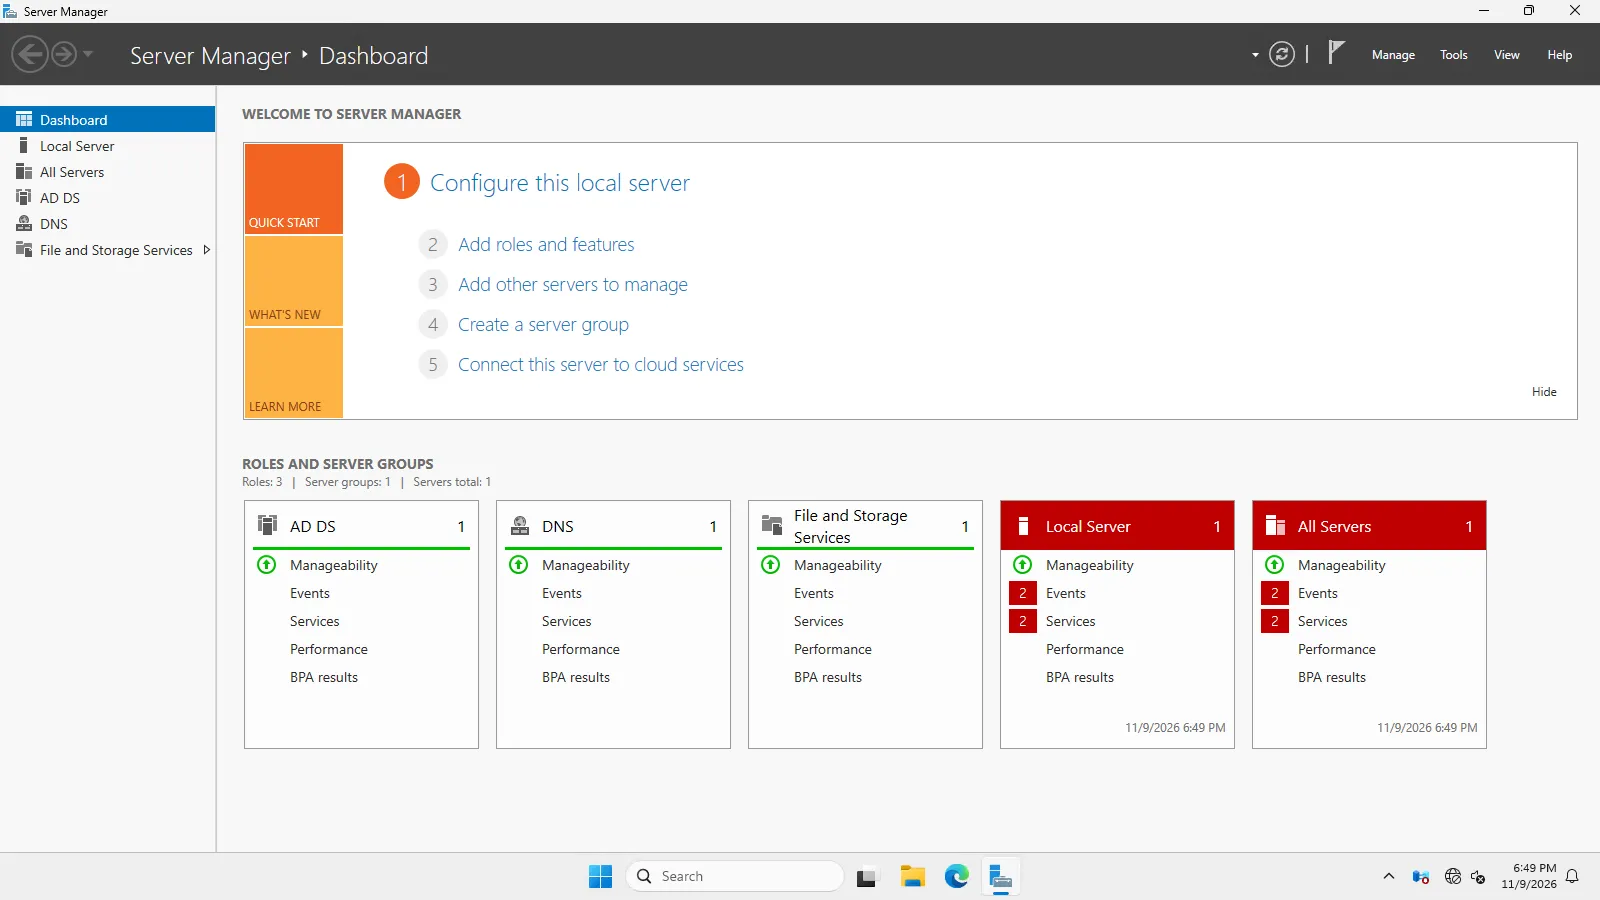
-
Check the domain, the forest and the domain controller:
Terminal window Get-ADDomain | Format-List Name, DNSRoot, NetBIOSName, DomainMode, PDCEmulatorGet-ADForest | Format-List Name, ForestMode, SchemaMasterGet-ADDomainController | Format-List HostName, IPv4Address, Site, IsGlobalCatalog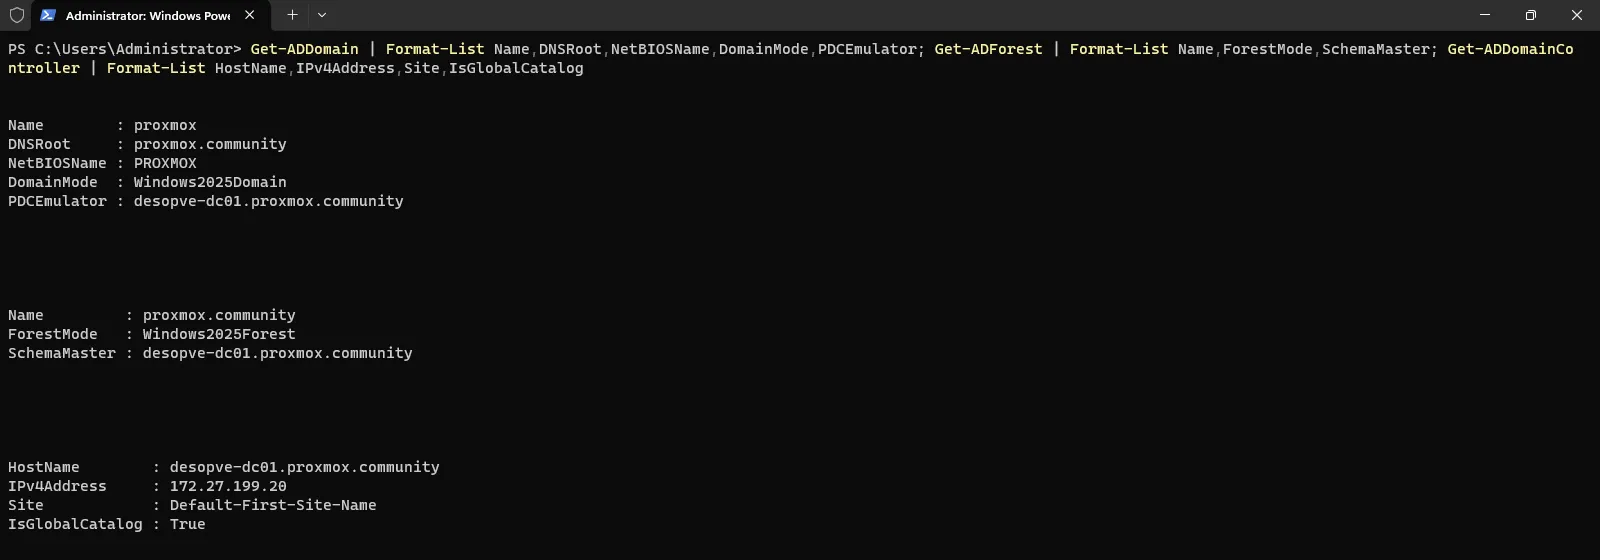
The functional level is Windows2025Domain / Windows2025Forest, the default for a new forest on Windows Server 2025.
5. Prepare the lab DNS
Section titled “5. Prepare the lab DNS”-
Create the reverse lookup zones for the two lab networks, integrated in Active Directory and replicated across the whole forest:
Terminal window Add-DnsServerPrimaryZone -NetworkId "172.27.199.0/24" -ReplicationScope ForestAdd-DnsServerPrimaryZone -NetworkId "172.32.199.0/24" -ReplicationScope ForestGet-DnsServerZone | Format-Table ZoneName, ZoneType, IsDsIntegrated, IsReverseLookupZone -AutoSize
-
Register all the lab servers.
-CreatePtralso creates the reverse record (PTR).proxyandntpare aliases (CNAME) ofnetsvc: if the service moves one day, you only need to change the alias:Terminal window $z = 'proxmox.community'Add-DnsServerResourceRecordA -ZoneName $z -Name desopve01 -IPv4Address 172.27.199.21 -CreatePtrAdd-DnsServerResourceRecordA -ZoneName $z -Name desopve02 -IPv4Address 172.27.199.22 -CreatePtrAdd-DnsServerResourceRecordA -ZoneName $z -Name desopve03 -IPv4Address 172.27.199.23 -CreatePtrAdd-DnsServerResourceRecordA -ZoneName $z -Name desopve04 -IPv4Address 172.27.199.24 -CreatePtrAdd-DnsServerResourceRecordA -ZoneName $z -Name desonas -IPv4Address 172.27.199.10 -CreatePtrAdd-DnsServerResourceRecordA -ZoneName $z -Name netsvc -IPv4Address 172.27.199.250 -CreatePtrAdd-DnsServerResourceRecordA -ZoneName $z -Name esxi8 -IPv4Address 172.27.199.30 -CreatePtrAdd-DnsServerResourceRecordCName -ZoneName $z -Name proxy -HostNameAlias netsvc.proxmox.communityAdd-DnsServerResourceRecordCName -ZoneName $z -Name ntp -HostNameAlias netsvc.proxmox.communityipconfig /registerdnsipconfig /registerdnsregisters the domain controller itself again, so that its reverse record is also created in the zone you have just created. Check the records:Terminal window Get-DnsServerResourceRecord -ZoneName $z | Where-Object RecordType -in 'A','CNAME' |Format-Table HostName, RecordType,@{n='Dato';e={ if ($_.RecordType -eq 'A') { $_.RecordData.IPv4Address } else { $_.RecordData.HostNameAlias } }} -AutoSize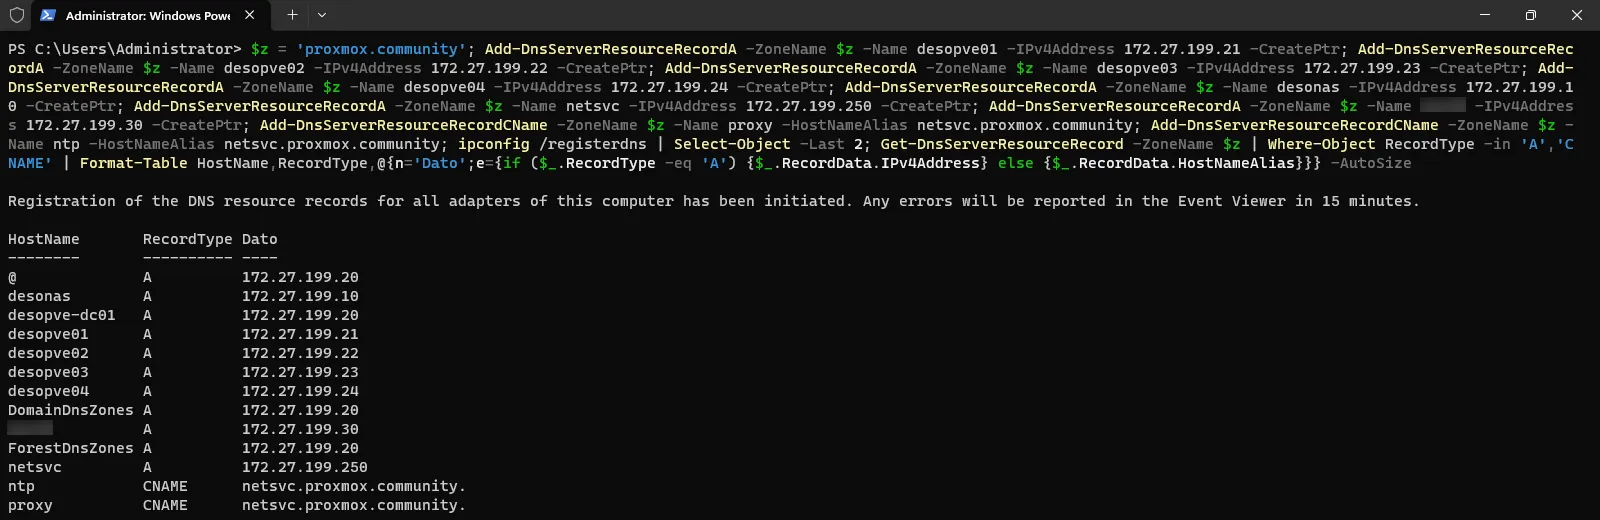
-
Also register the lab router and the servers introduced in the later tracks (Proxmox Backup Server, Proxmox Datacenter Manager and the VMs of the source ESXi server in lab 50). The router has an address on both networks: the A record points to the management address, while for
172.32.199.1the reverse record is enough:Terminal window Add-DnsServerResourceRecordA -ZoneName $z -Name rtr-core -IPv4Address 172.27.199.1 -CreatePtrAdd-DnsServerResourceRecordPtr -ZoneName 199.32.172.in-addr.arpa -Name 1 -PtrDomainName rtr-core.proxmox.communityAdd-DnsServerResourceRecordA -ZoneName $z -Name desopbs01 -IPv4Address 172.27.199.40 -CreatePtrAdd-DnsServerResourceRecordA -ZoneName $z -Name desopdm01 -IPv4Address 172.27.199.41 -CreatePtrAdd-DnsServerResourceRecordA -ZoneName $z -Name linux-src01 -IPv4Address 172.27.199.31 -CreatePtrAdd-DnsServerResourceRecordA -ZoneName $z -Name win-src01 -IPv4Address 172.27.199.32 -CreatePtr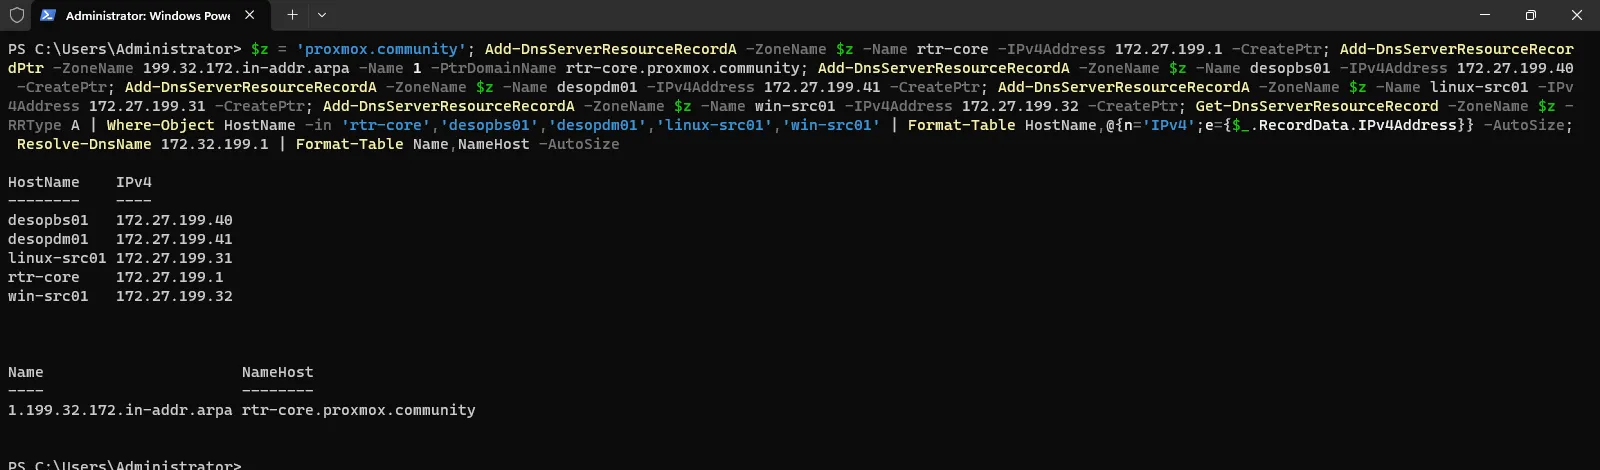
-
The DNS server registers the domain controller’s name for every address it listens on, including
172.32.199.20on theCLUSTERadapter: disabling registration in step 3.6 is not enough. A client could therefore receive172.32.199.20as the DC address and fail to reach it. Look for the records that point to the cluster network:Terminal window Get-DnsServerResourceRecord -ZoneName proxmox.community -RRType A |Where-Object { $_.RecordData.IPv4Address -like '172.32.*' }If
desopve-dc01appears with172.32.199.20, restrict the DNS server to listen only on the management address (in DNS Manager: Properties → Interfaces → Only the following IP addresses) and restart the service. As soon as the listening addresses change, the DNS server removes the cluster network record by itself:Terminal window $s = Get-DnsServerSetting -All$s.ListeningIPAddress = @('172.27.199.20')Set-DnsServerSetting -InputObject $sRestart-Service DNSGet-DnsServerResourceRecord -ZoneName proxmox.community -RRType A -Name desopve-dc01 |Format-Table HostName, RecordType, @{n='IPv4Address';e={$_.RecordData.IPv4Address}} -AutoSizeOutput HostName RecordType IPv4Address-------- ---------- -----------desopve-dc01 A 172.27.199.20If you repeat the previous search, it no longer returns anything. You see the same result by resolving the name:
Terminal window Resolve-DnsName desopve-dc01.proxmox.community -DnsOnly | Format-Table Name, Type, IPAddress -AutoSize
In Lab 25, with IPv6,
fd27:199::20is added to the list of listening addresses. -
You can also see the same records graphically in DNS Manager (
dnsmgmt.msc) → Forward Lookup Zones →proxmox.community.
6. Synchronize the time
Section titled “6. Synchronize the time”The first domain controller of the forest holds the PDC emulator role and is the time source for the whole domain. Configure it to synchronize with the lab NTP server:
w32tm /config /manualpeerlist:"ntp.proxmox.community,0x8" /syncfromflags:manual /reliable:yes /updateRestart-Service w32timew32tm /resync /forcew32tm /query /statusGet-Date0x8 tells the service to query the server in client mode; /reliable:yes advertises the DC as a reliable time source for the domain members.
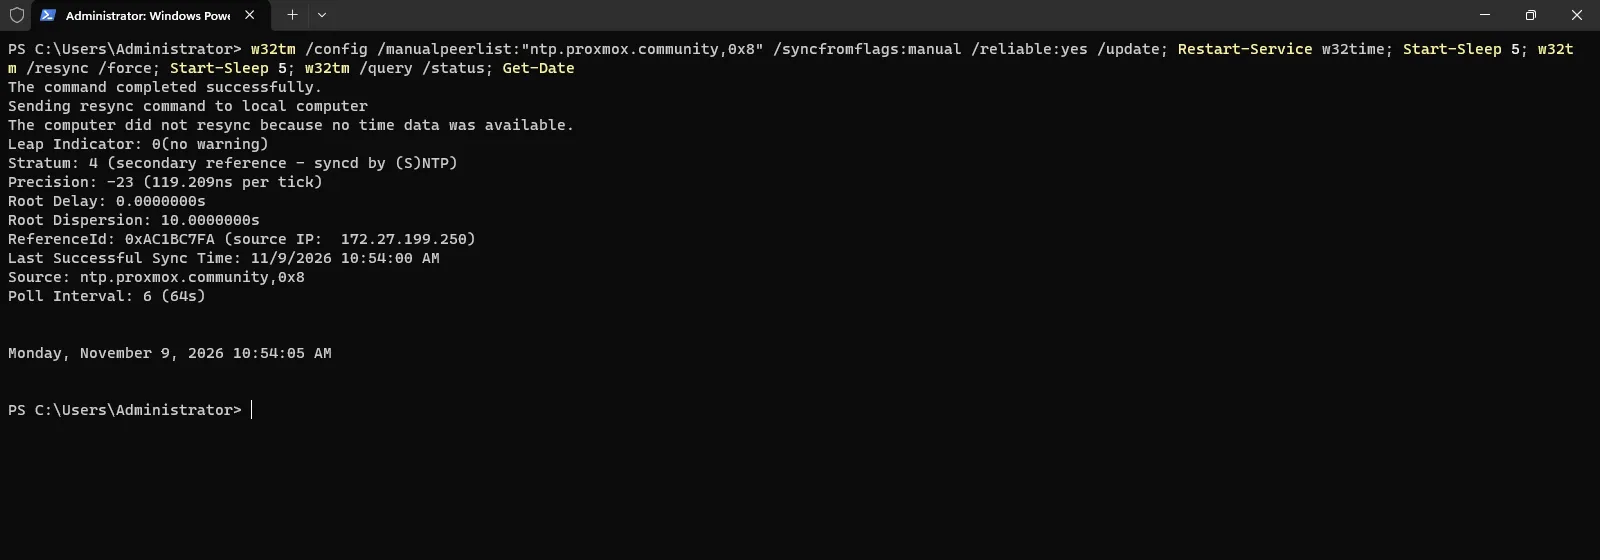
Right after the service restart, w32tm /resync may answer no time data was available: the service has not received the first response yet. What counts is w32tm /query /status: Source must be ntp.proxmox.community,0x8, Last Successful Sync Time recent, and ReferenceId must show the address 172.27.199.250.
7. Configure the system proxy
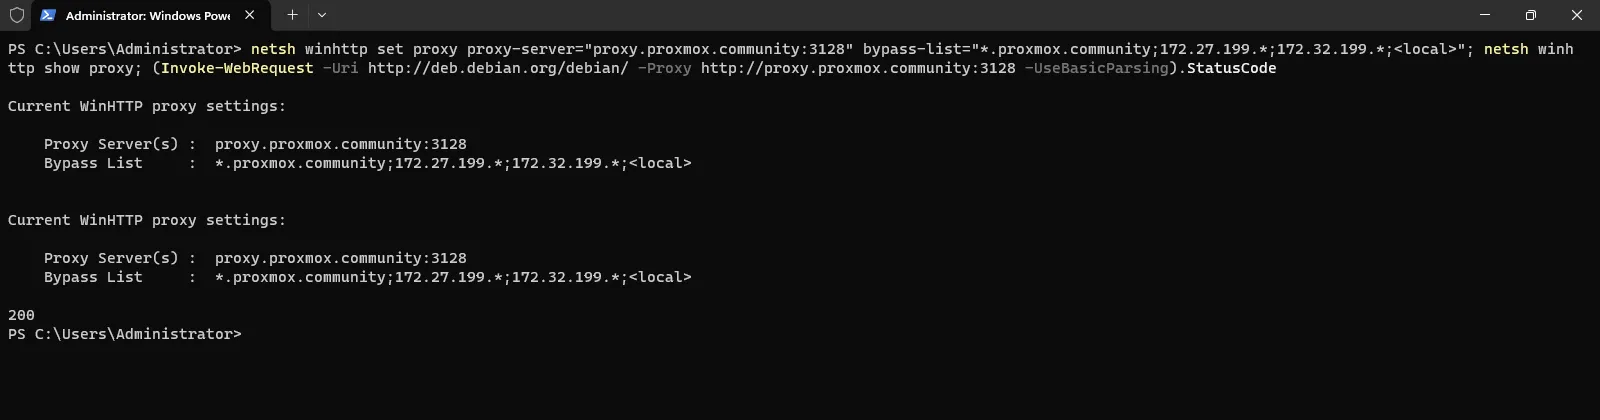
Section titled “7. Configure the system proxy”The Windows services that download data (for example root certificate updates) use the WinHTTP proxy, which is separate from the browser’s. Set it and check that the proxy responds:
netsh winhttp set proxy proxy-server="proxy.proxmox.community:3128" bypass-list="*.proxmox.community;172.27.199.*;172.32.199.*;<local>"netsh winhttp show proxy(Invoke-WebRequest -Uri http://deb.debian.org/debian/ -Proxy http://proxy.proxmox.community:3128 -UseBasicParsing).StatusCodeThe bypass-list keeps the traffic to the lab servers from going through the proxy.
Verification and tests
Section titled “Verification and tests”From the domain controller:
Resolve-DnsName desopve01.proxmox.community | Format-Table Name, Type, IPAddress -AutoSizeResolve-DnsName 172.27.199.21 | Format-Table Name, Type, NameHost -AutoSizeResolve-DnsName proxy.proxmox.community | Format-Table Name, Type, NameHost, IPAddress -AutoSizeResolve-DnsName www.proxmox.community -ErrorAction SilentlyContinue -ErrorVariable e | Out-Null; $e[0].Exception.Messagew32tm /query /source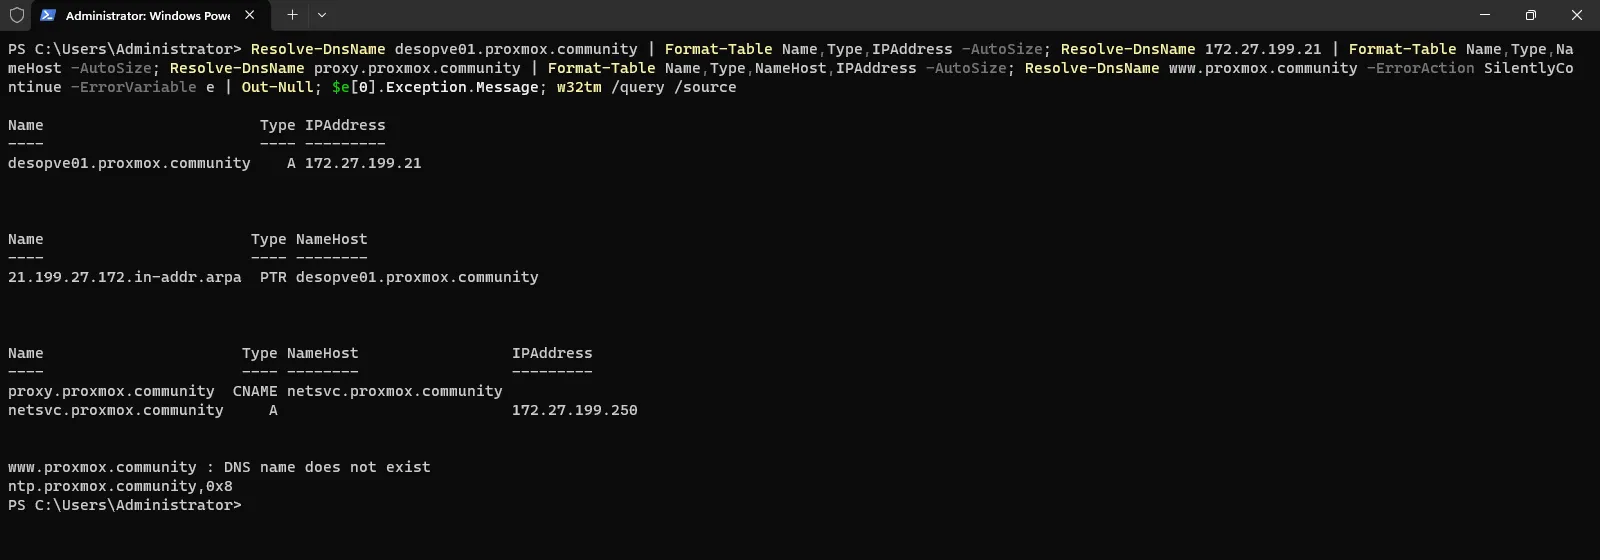
Expected results:
-
desopve01.proxmox.community→172.27.199.21, and172.27.199.21→desopve01.proxmox.community. -
proxy.proxmox.communityis an alias ofnetsvc.proxmox.community→172.27.199.250. -
www.proxmox.community→ DNS name does not exist: this is the effect of the authoritative zone described in How it works. - The time source is
ntp.proxmox.community,0x8.
Final lab state
Section titled “Final lab state”desopve-dc01.proxmox.community(172.27.199.20) is the domain controller of theproxmox.communityforest (NetBIOSPROXMOX), with integrated DNS listening only on the management address.- Forward and reverse zones populated with all the lab servers;
proxyandntpaliases pointing tonetsvc. - Time synchronized with
ntp.proxmox.community; WinHTTP proxy configured. - Remote Desktop enabled.
What you learned
Section titled “What you learned”- How to install Windows Server 2025 and promote it to domain controller from PowerShell.
- Why forward and reverse DNS and accurate time are prerequisites for a cluster.
- What it means to have an authoritative DNS server for a domain that also exists on the Internet (split DNS).
- How a server reaches the Internet through a proxy, without public DNS and without a gateway to the Internet.